CI/CD Workflow for Web3 with BuildBear
Guide to set up CI/CD using the BuildBear GitHub App to build, deploy, verify, and test smart contracts in isolated Sandbox environments.
Overview
BuildBear's CI/CD Service automates the creation of Sandbox environments and plugin installations, enabling you to test and deploy contracts either on a schedule or whenever you trigger a GitHub Action workflow.
Key benefits:
- GitHub Actions Integration: Use familiar GitHub Actions workflows without learning new configurations
- Foundry Support: Full compatibility with Foundry projects including 45 cheatcodes
- Enhanced Debugging: Access the BuildBear dashboard directly from GitHub logs for quick analysis
Tutorial Scope
This tutorial guides you through:
- Cloning a modified Uniswap V4 Core repository
- Setting up BuildBear's CI/CD workflow
- Automating contract building, deployment, verification, and testing in isolated Sandboxes
- Gaining full observability into contract interactions via transaction hashes
Prerequisites
We'll use a modified version of Uniswap V4 Core available at:
https://github.com/BuildBearLabs/tutorial-ci-cd-uniswap-v4-core
You can also use any other foundry contracts repository instead of the Uniswap V4: Checkout how to set it up below.
This modified version of the repository contains an additional deploy script to deploy some core contracts
You can either:
- Fork the repository to make changes
- Clone it directly to your local machine
This feature is currently in Beta Access. Contact us at [email protected] to request access.
Installation and Setup
Step 1: Install the BuildBear GitHub App
- Navigate to the CI/CD Dashboard using the sidebar link
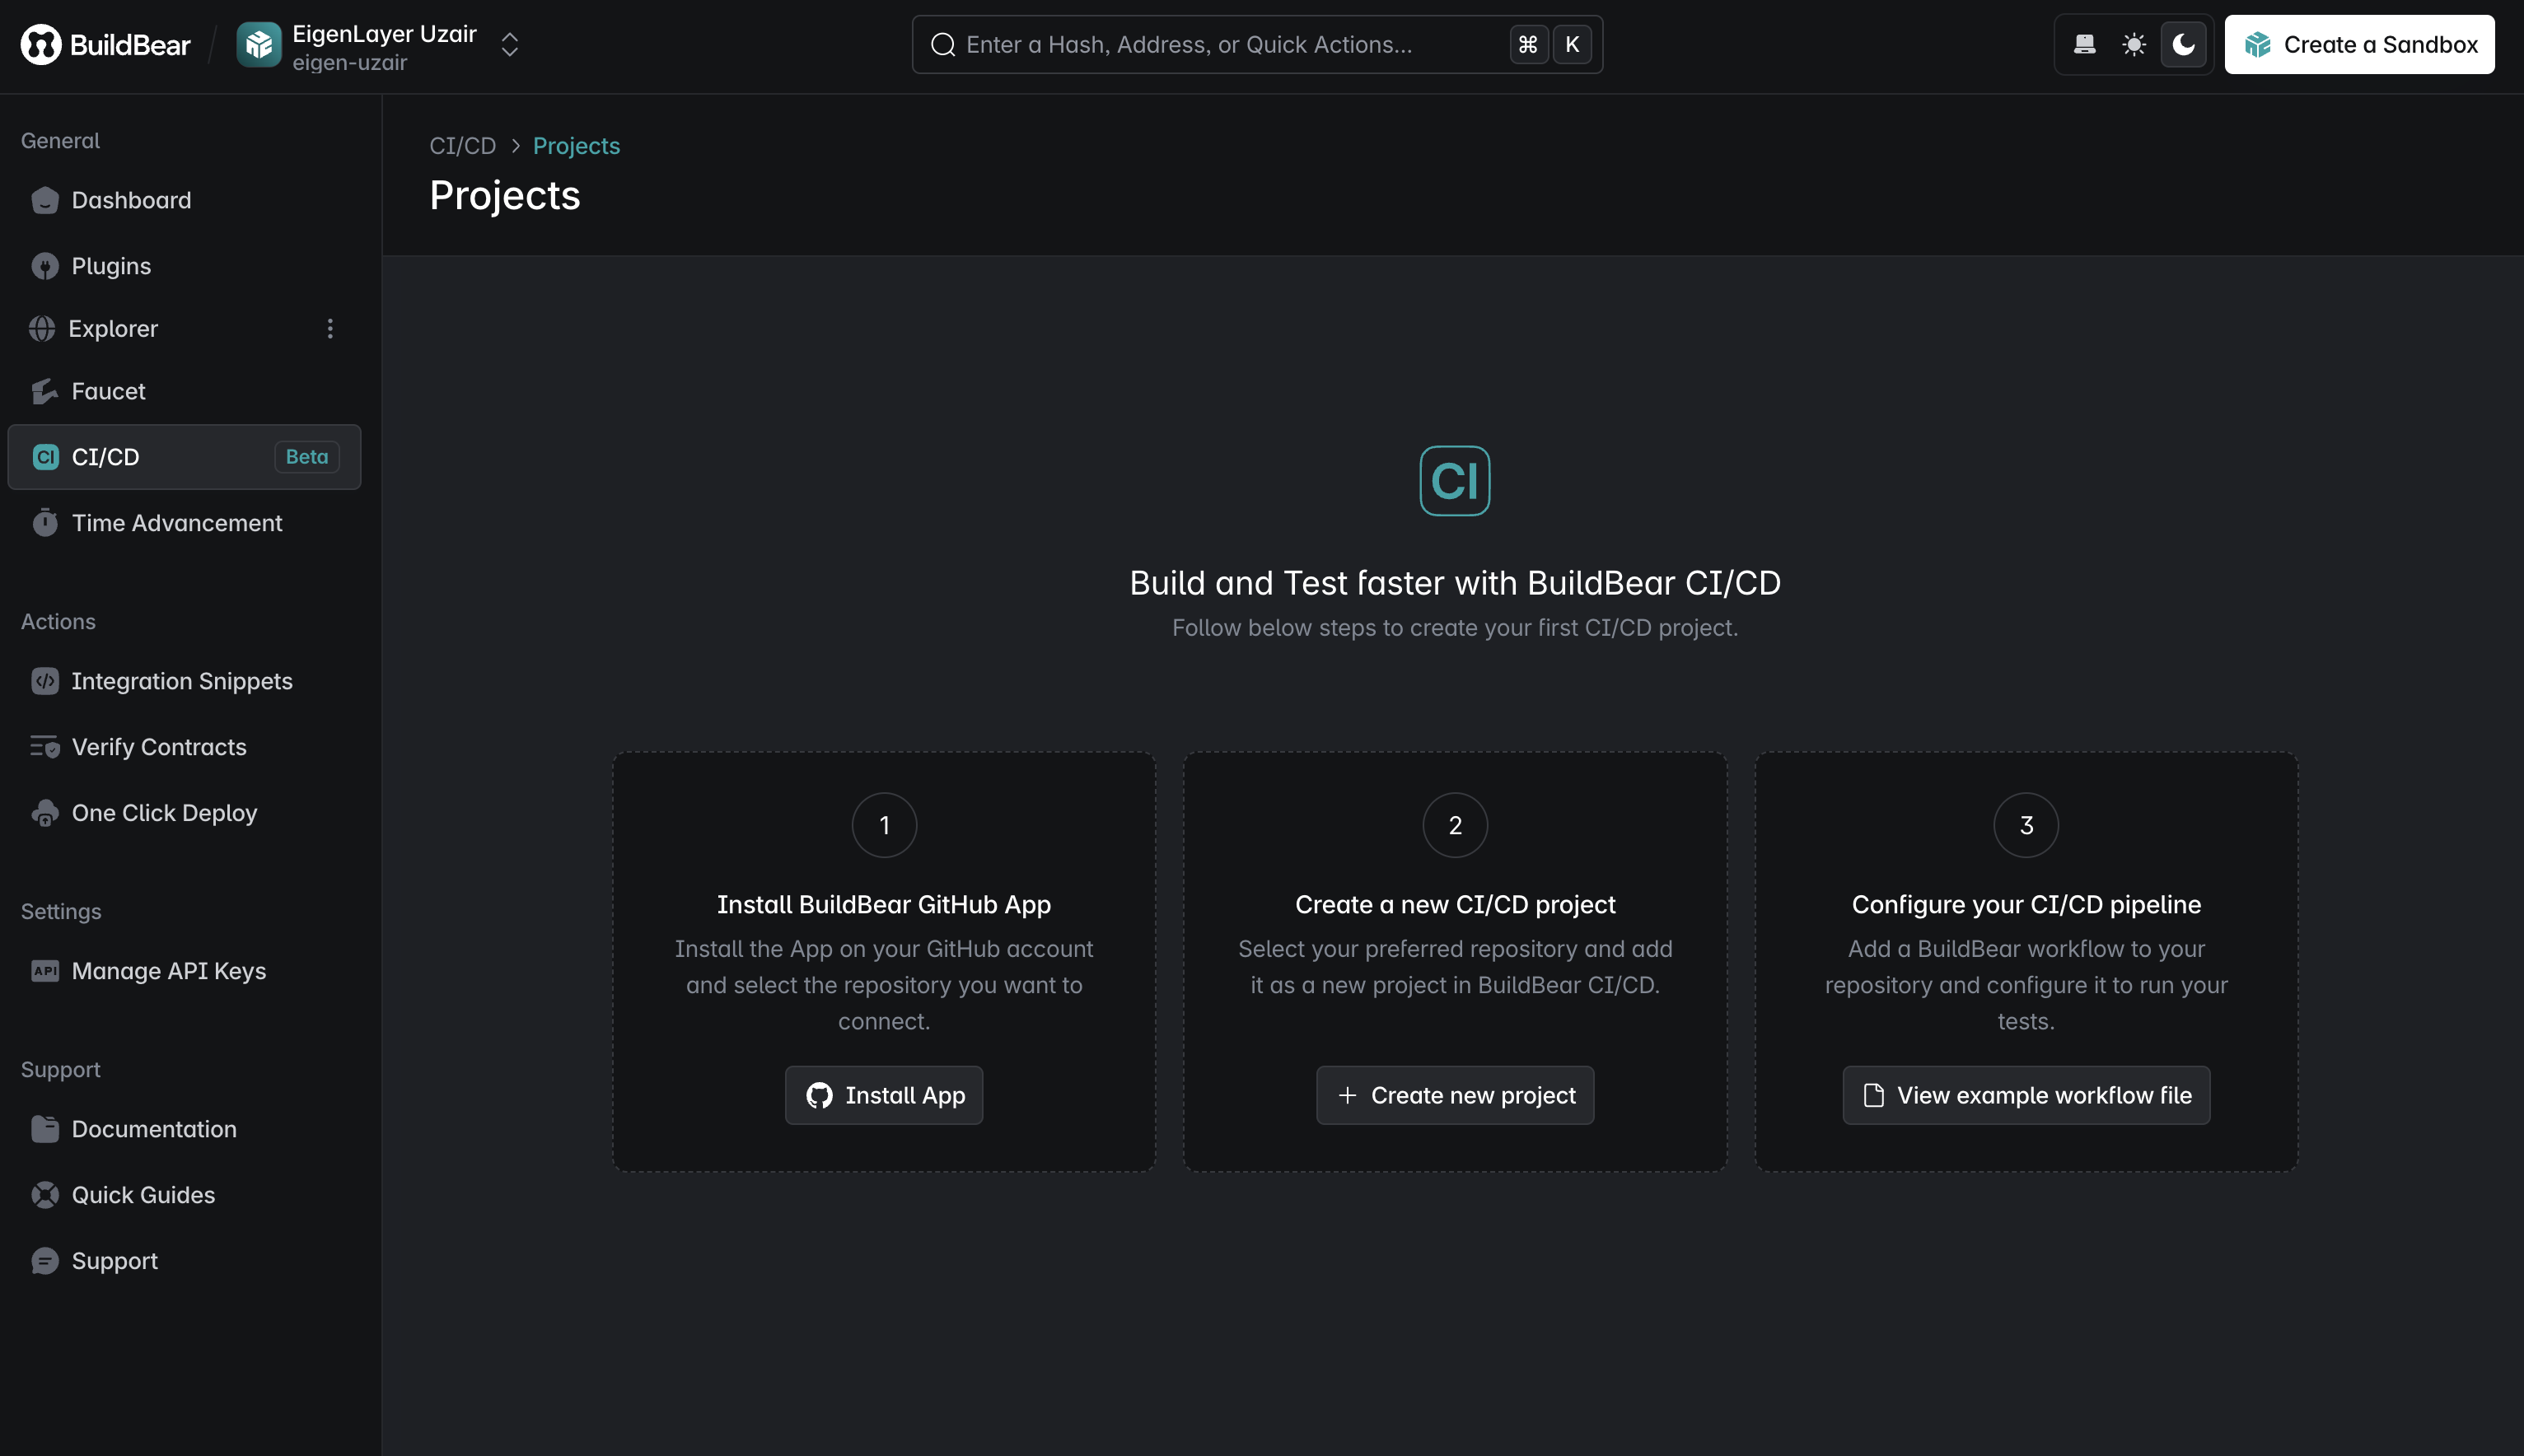
- Click "Install App"
- Select repositories to grant access (all or specific ones)

- Confirm installation

Step 2: Configure Repository Access
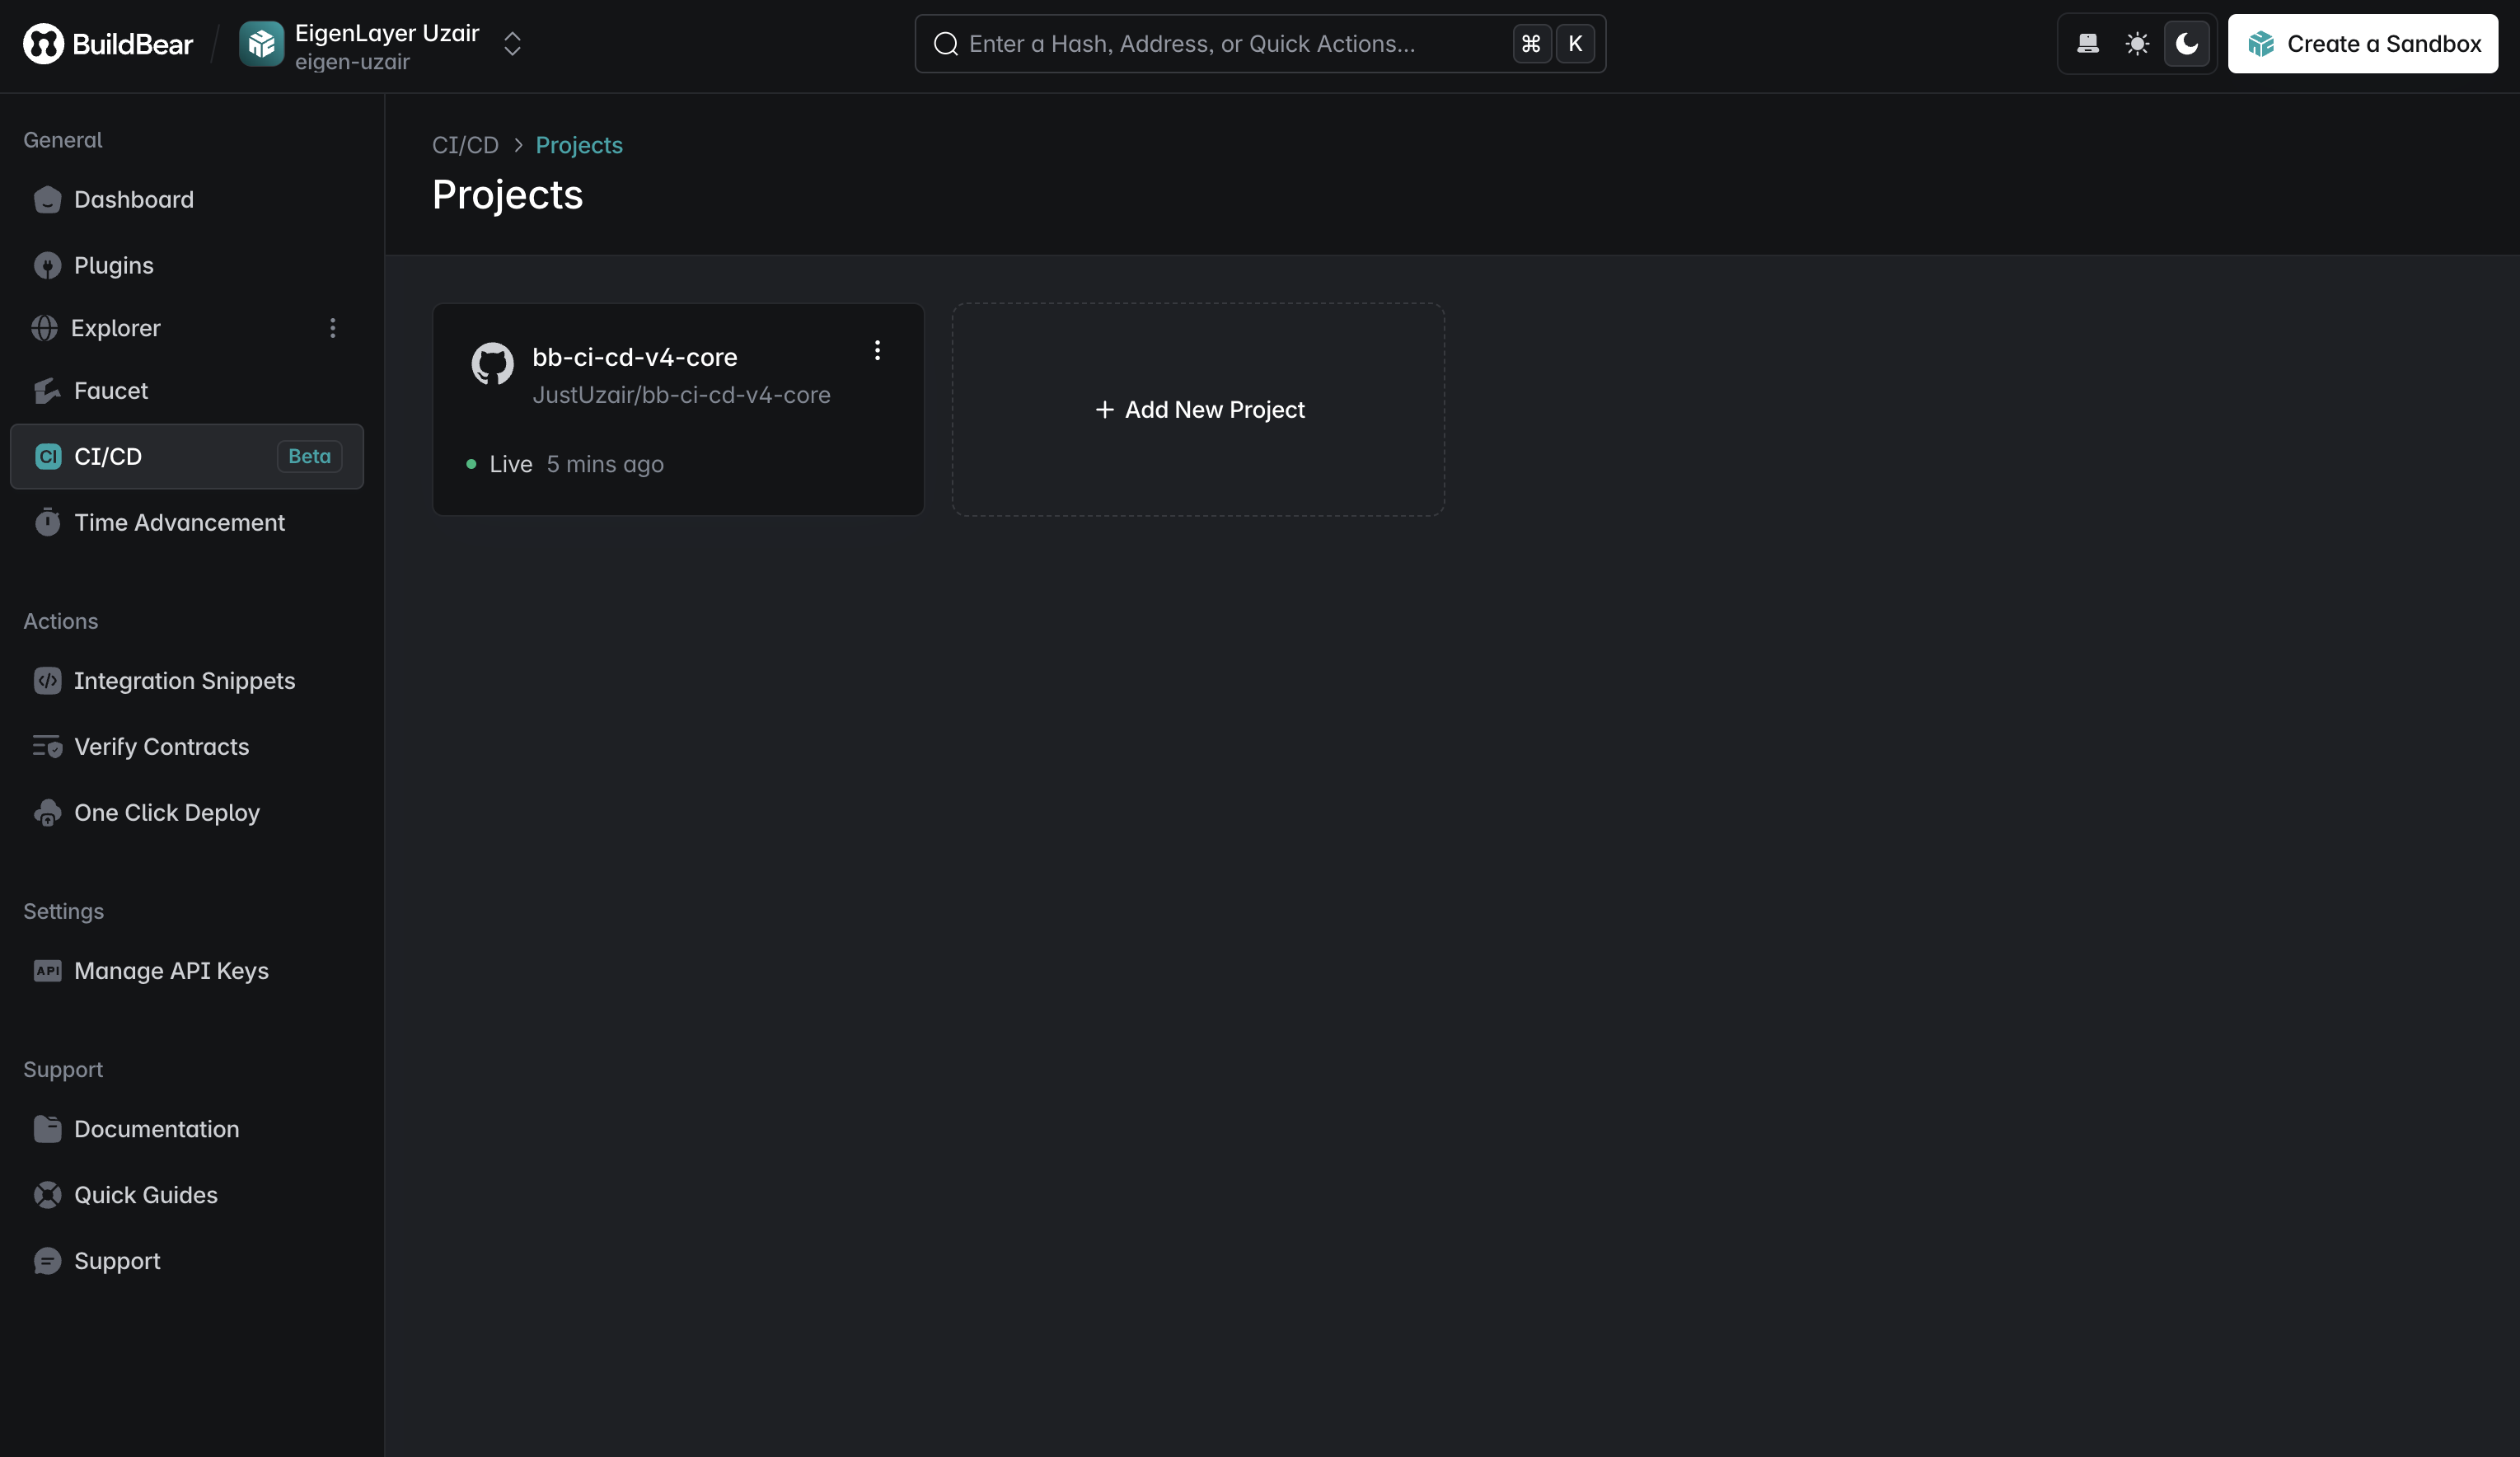
- From the CI/CD Dashboard, select your repository

- Click "Add Project"
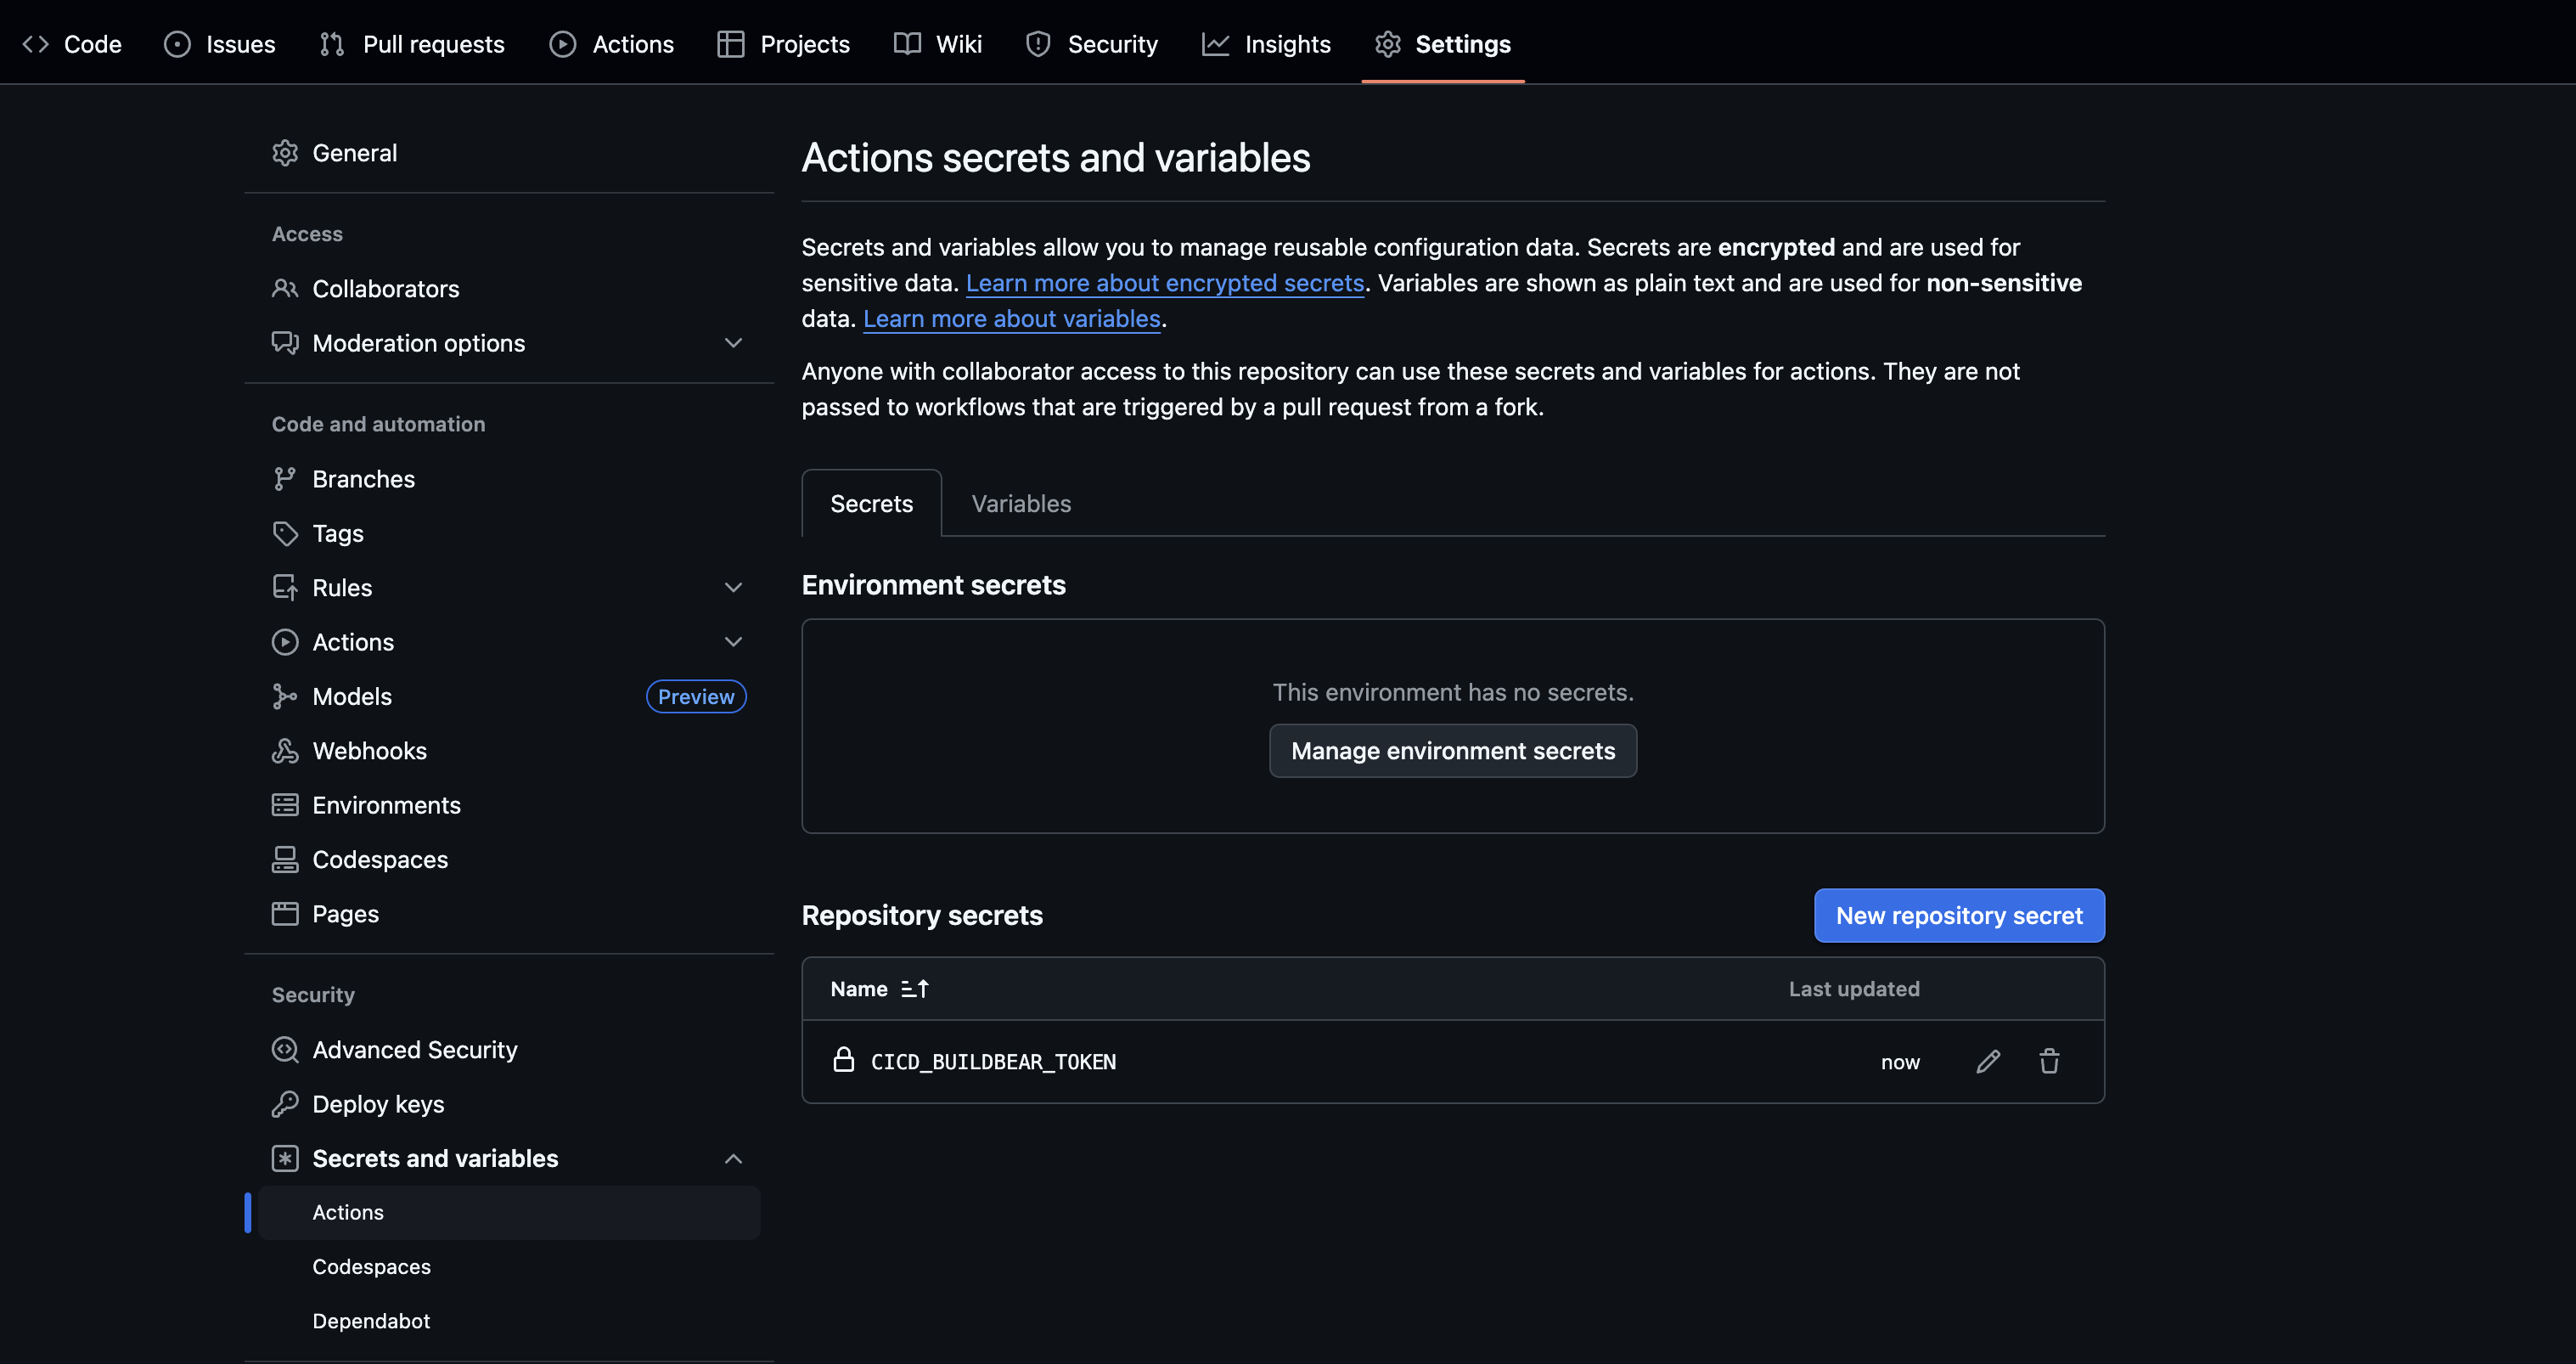
After adding the repository, copy the displayed API key and add it to your GitHub Repository Secrets as BUILDBEAR_API_KEY or any other variable name.
Step 3: Verify Setup
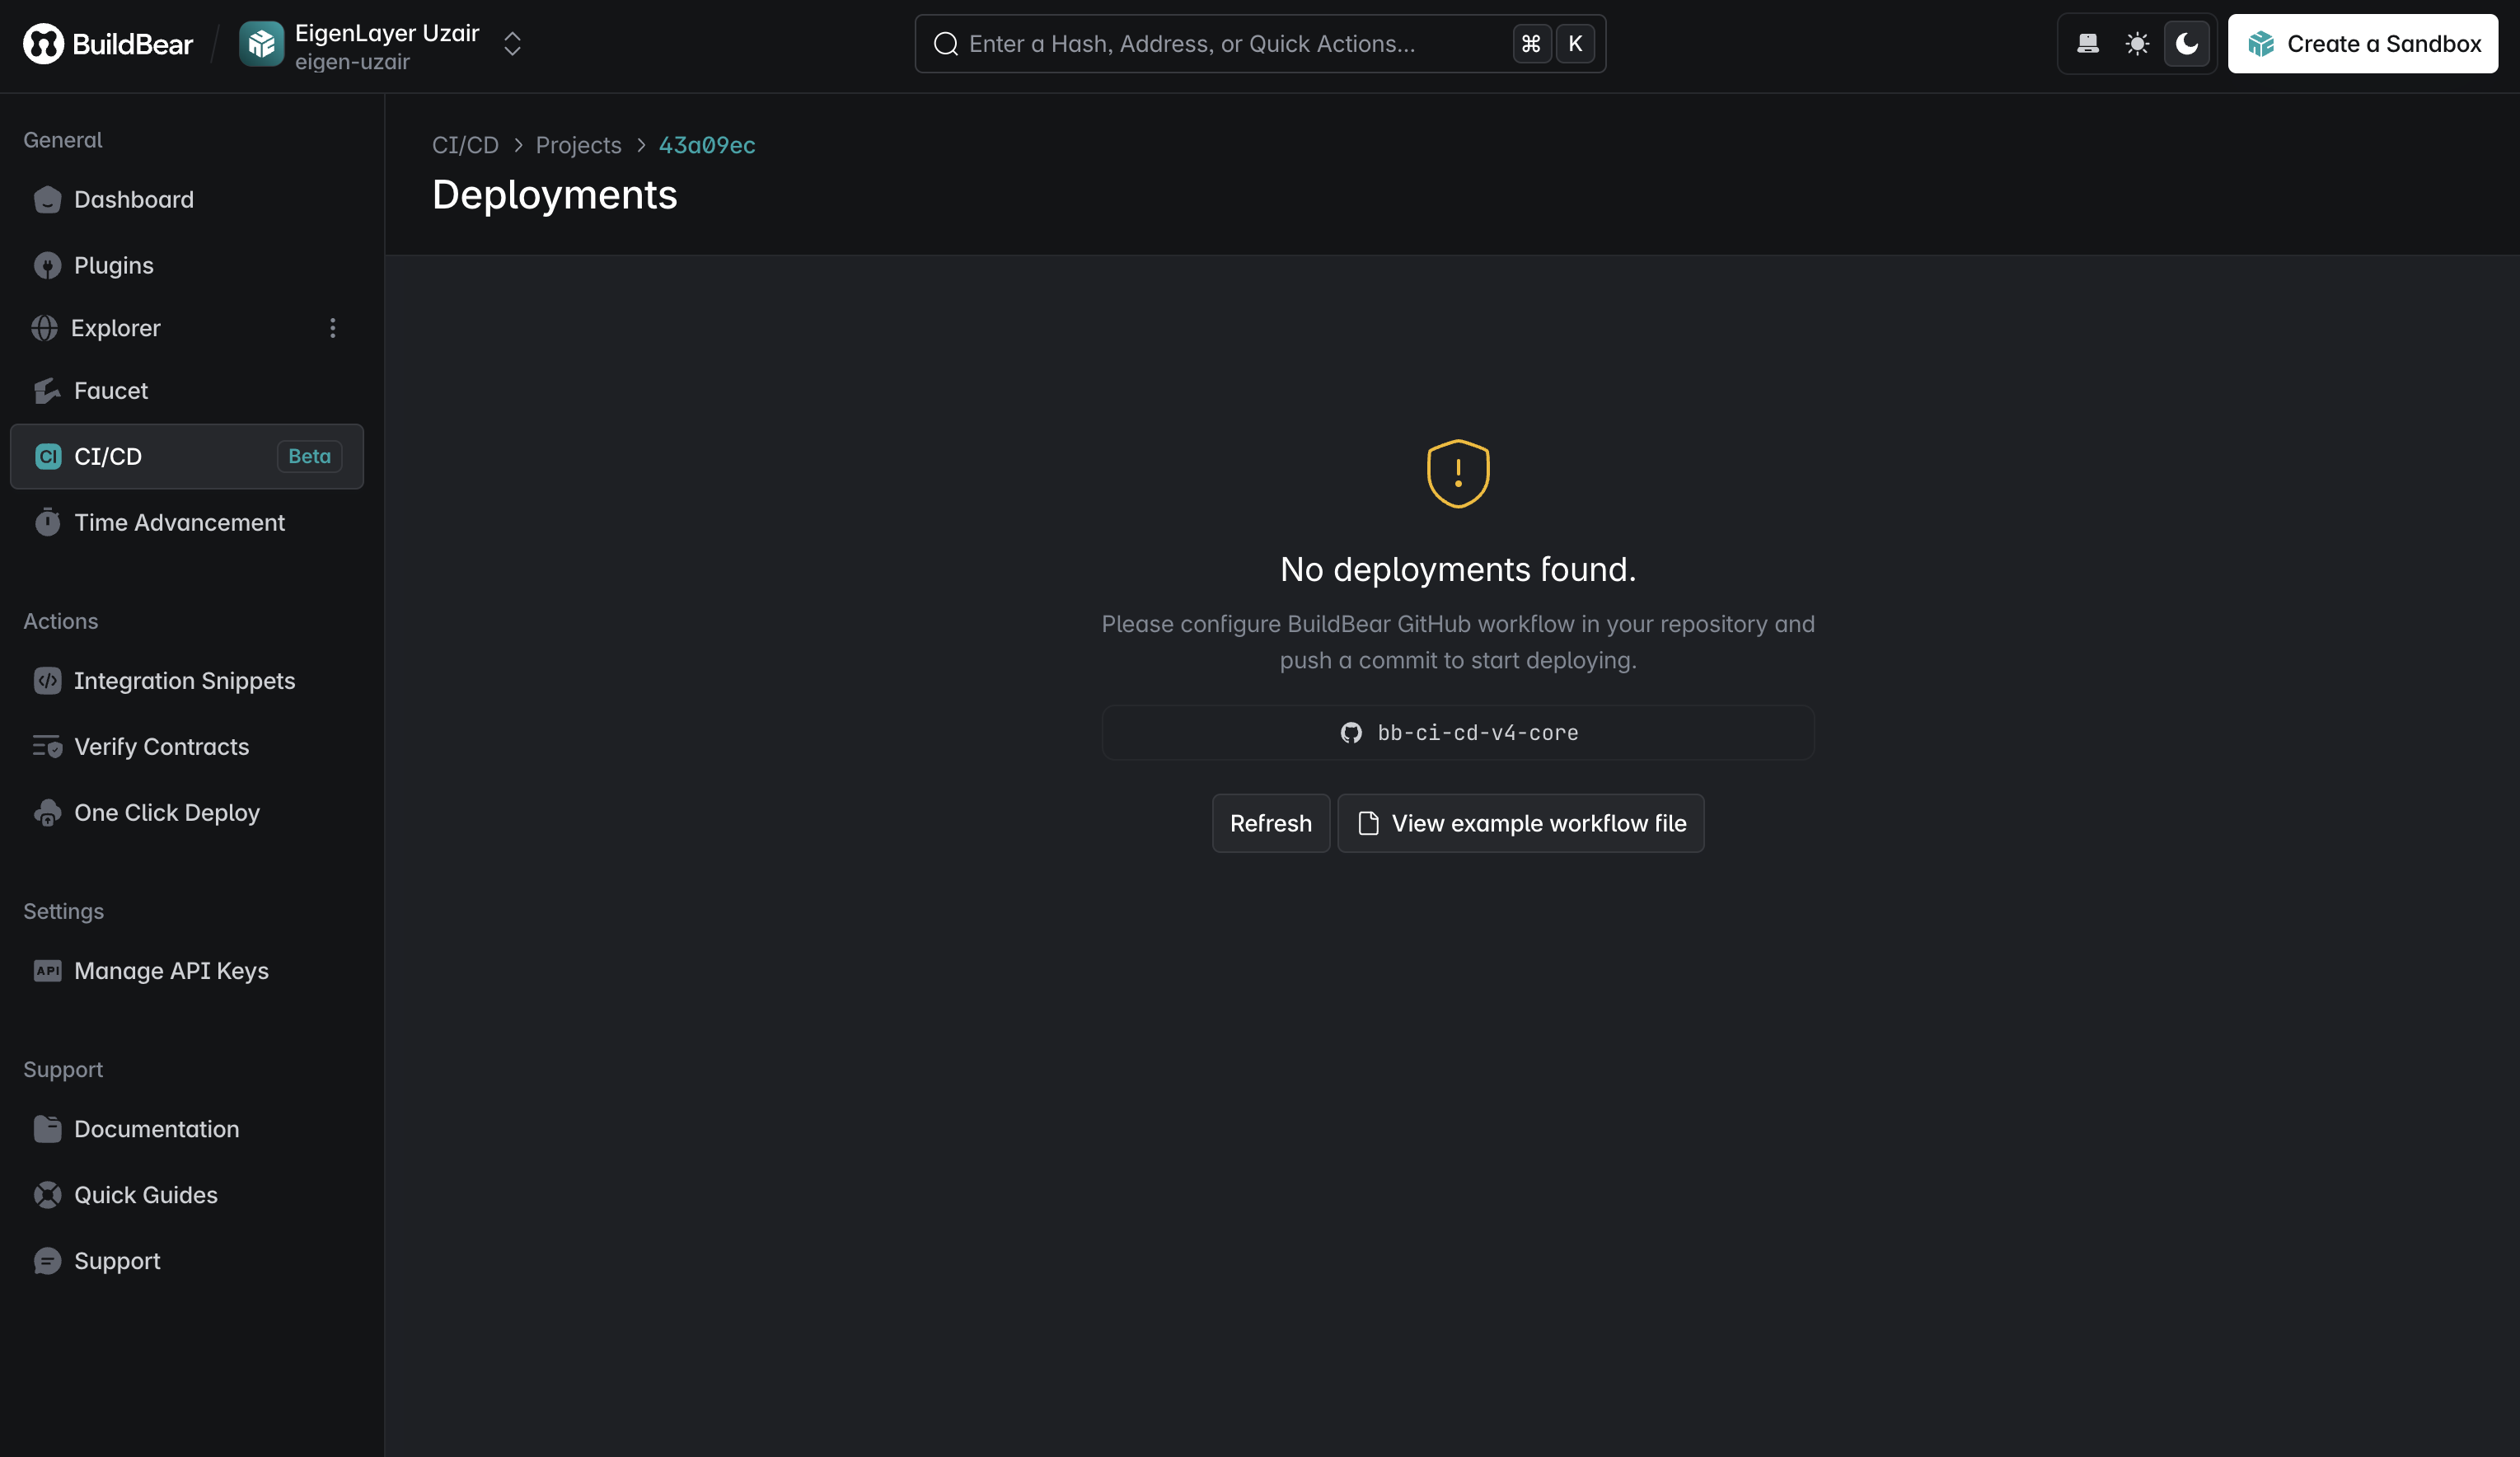
Your repository now appears in the CI/CD Dashboard. The initial view will be empty until you set up workflows.
Workflow Configuration
File Structure
The Uniswap V4 Core repository includes a buildbear.yml file in .github/workflows. If missing, create it manually with this content:
Workflow Explanation
This configuration:
- Checkout the repository code.
- Install Rust toolchain.
- Cache the Foundry repository and build artifacts.
- Clone the Foundry repository if it doesn't exist.
- Build Foundry from source and set the PATH.
- Show the Forge version.
- Create a directory for BuildBear output.
- Run the BuildBear action to test the CI/CD workflow.
Please note that some of the steps are mandatory for the BuildBear CI/CD workflow to function correctly, such as caching the Foundry repository and build artifacts, and running the BuildBear action. This is where you can add your custom jobs & related steps, to deploy contracts, verify them on-chain, running tests in the Sandbox, etc.
Monitoring Workflow Execution
After pushing changes:
- View progress in GitHub's Actions tab
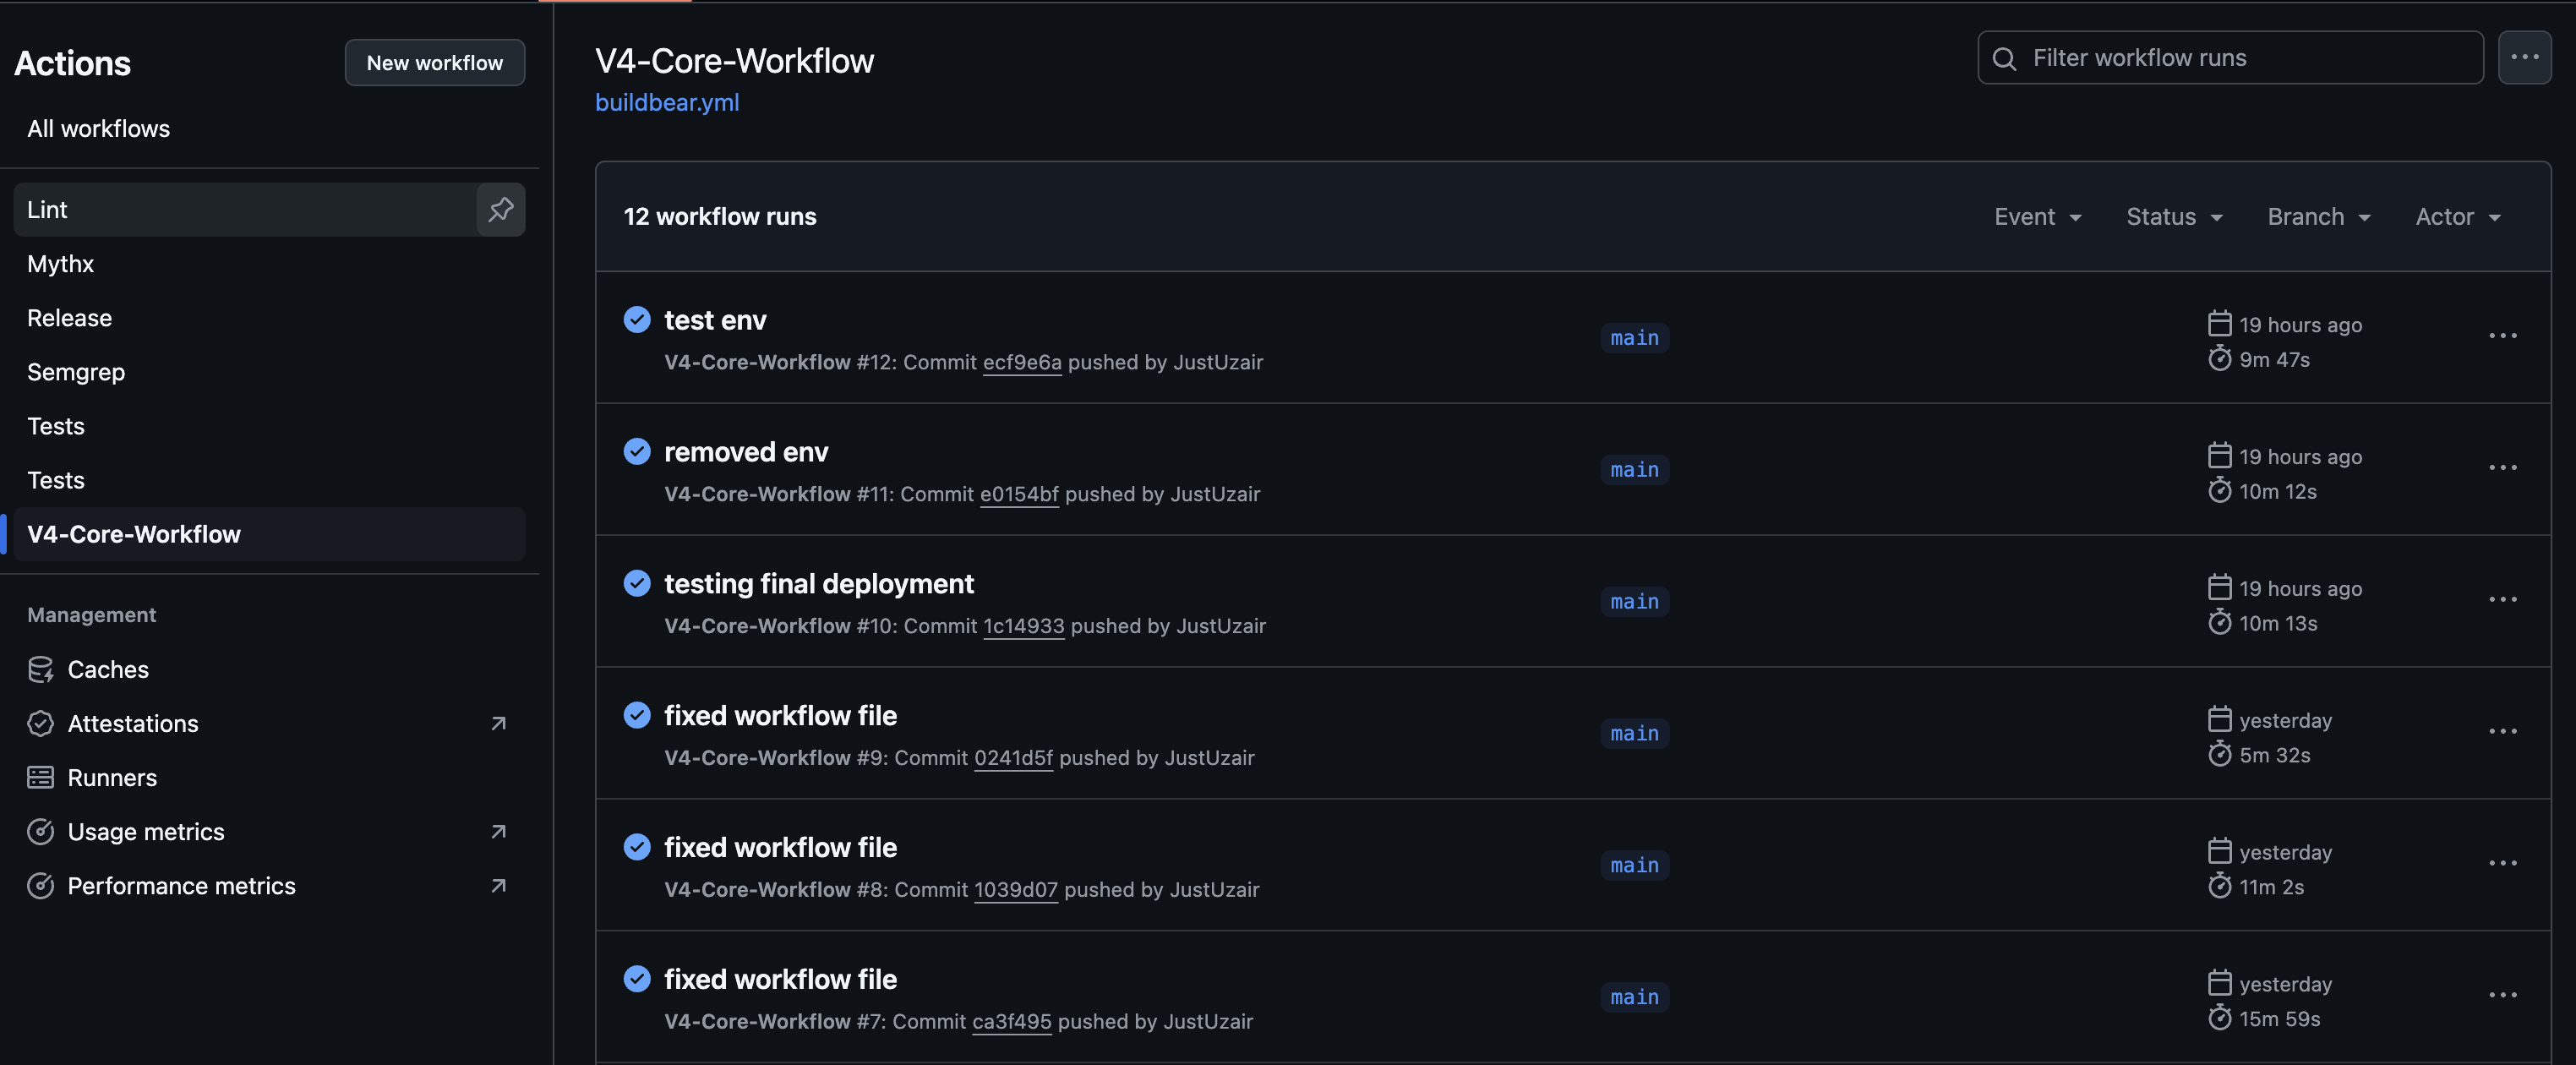
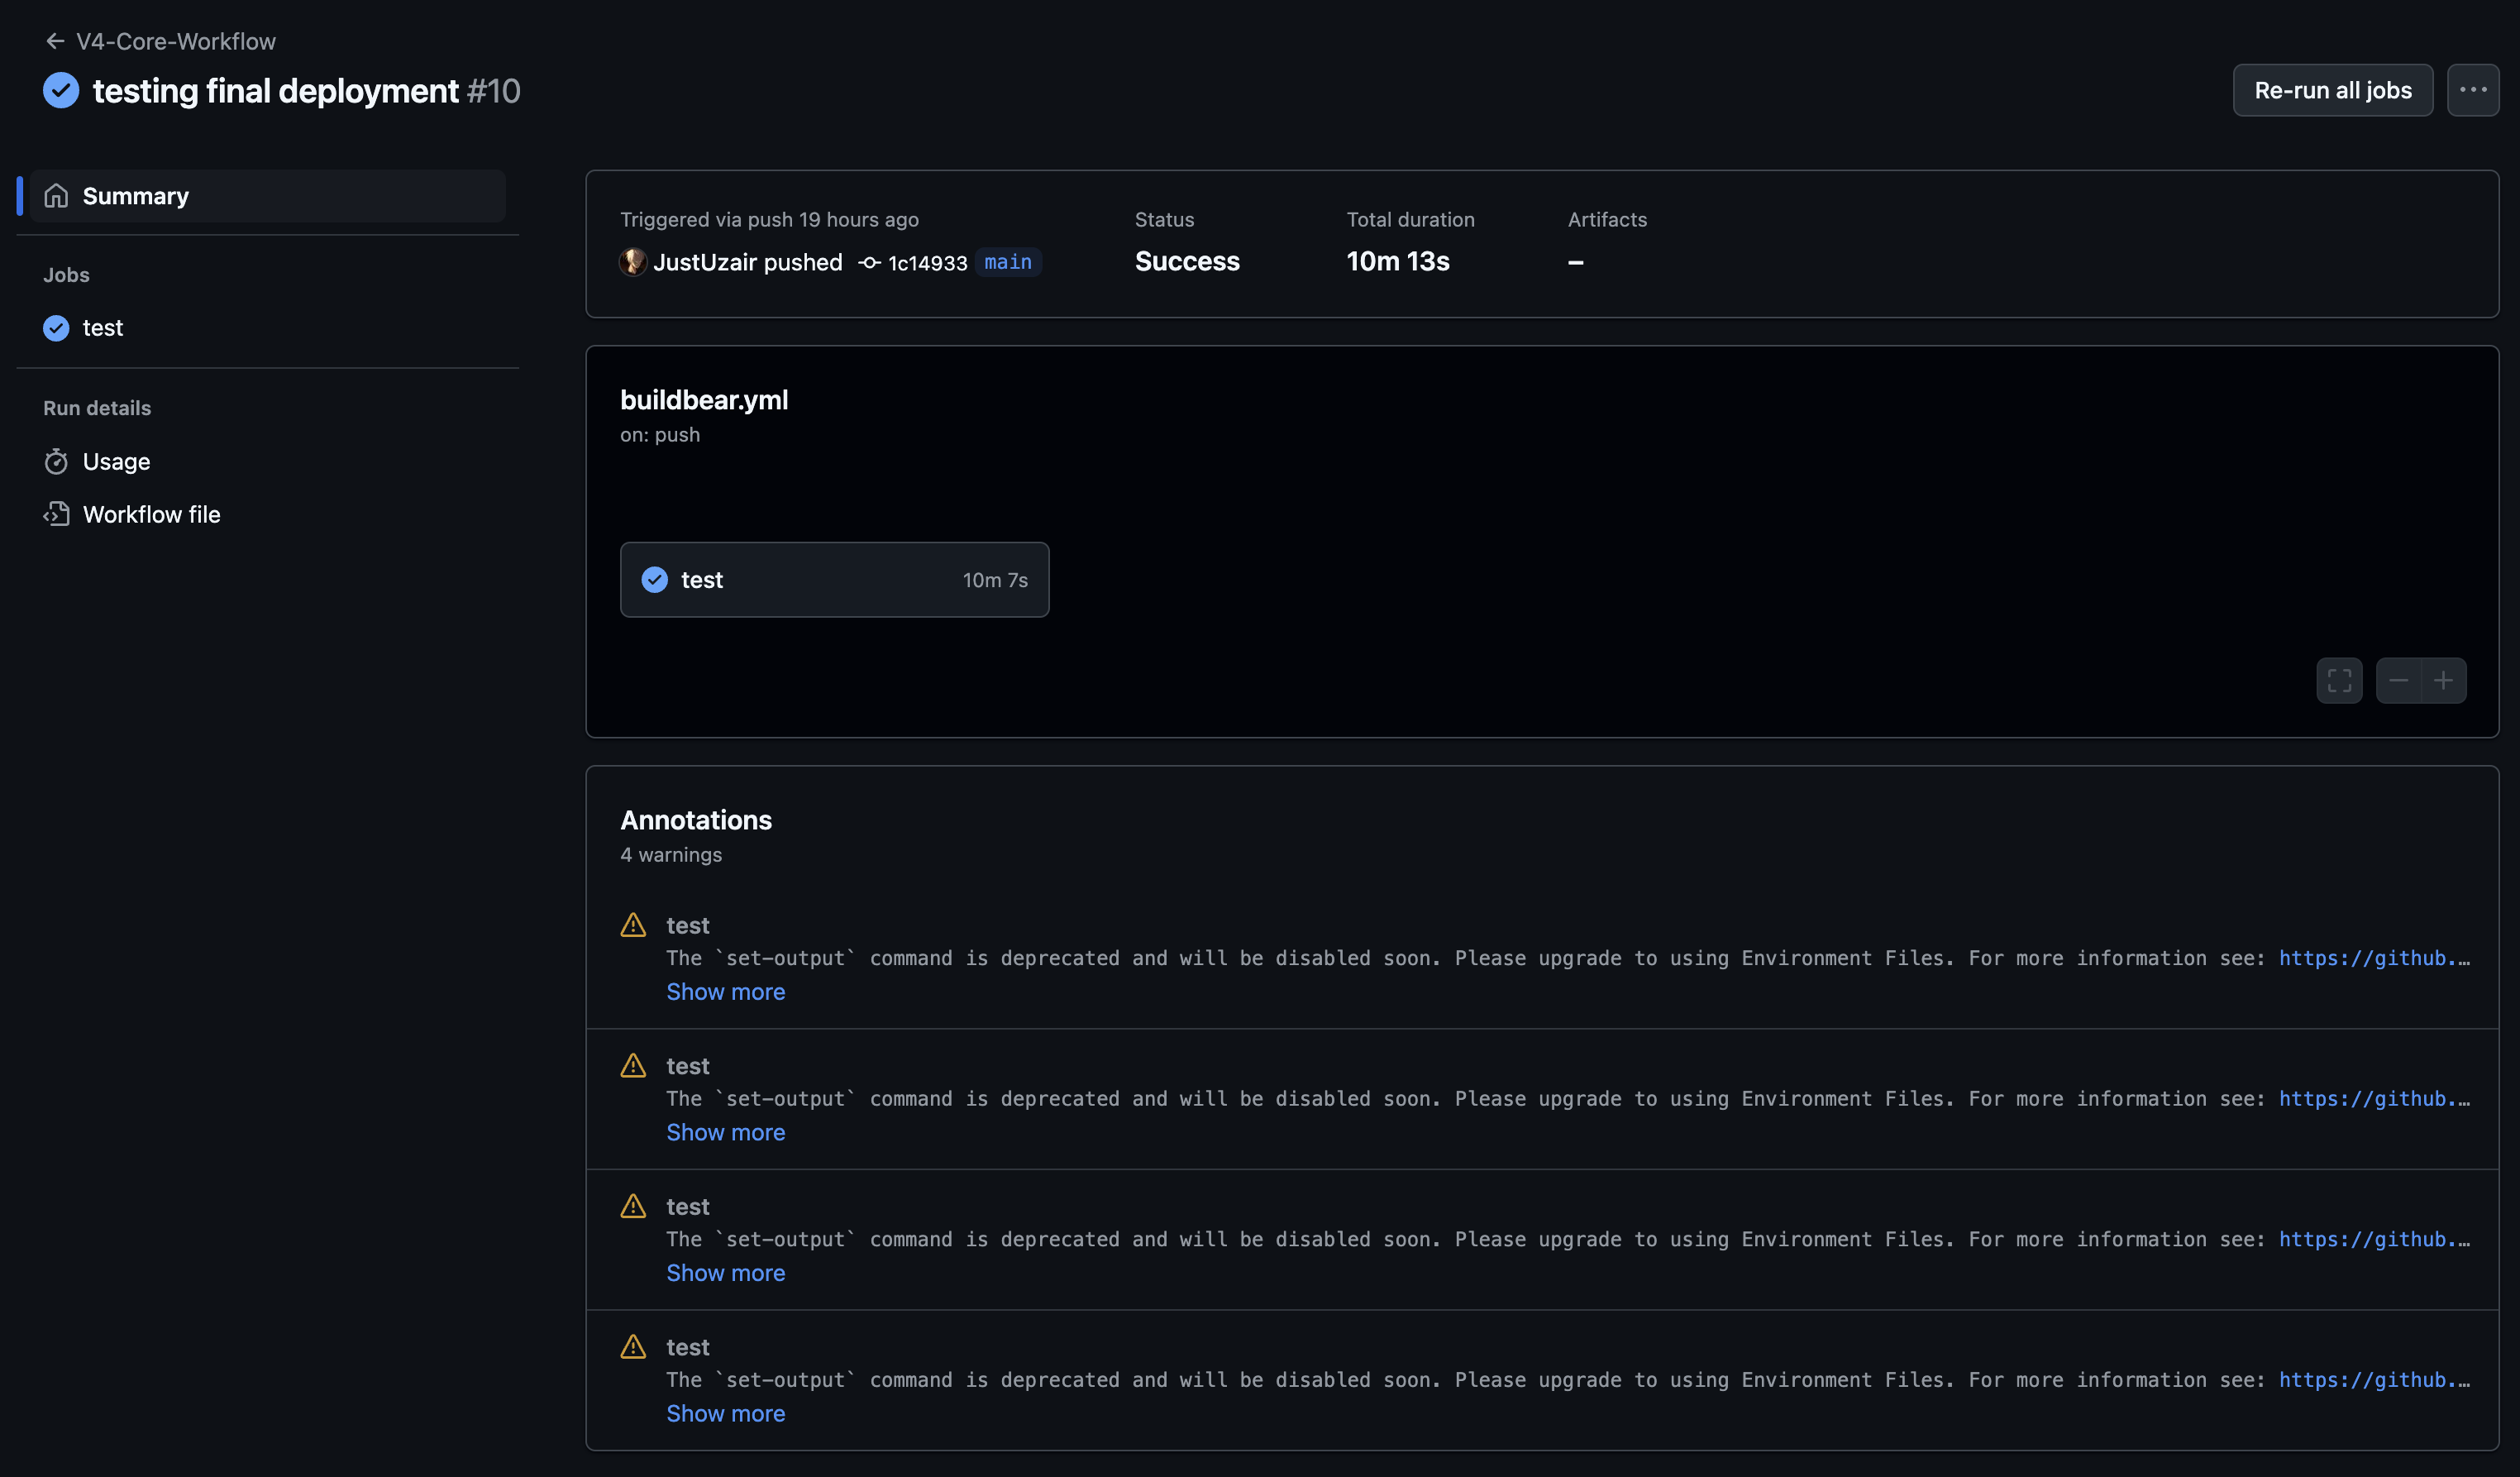
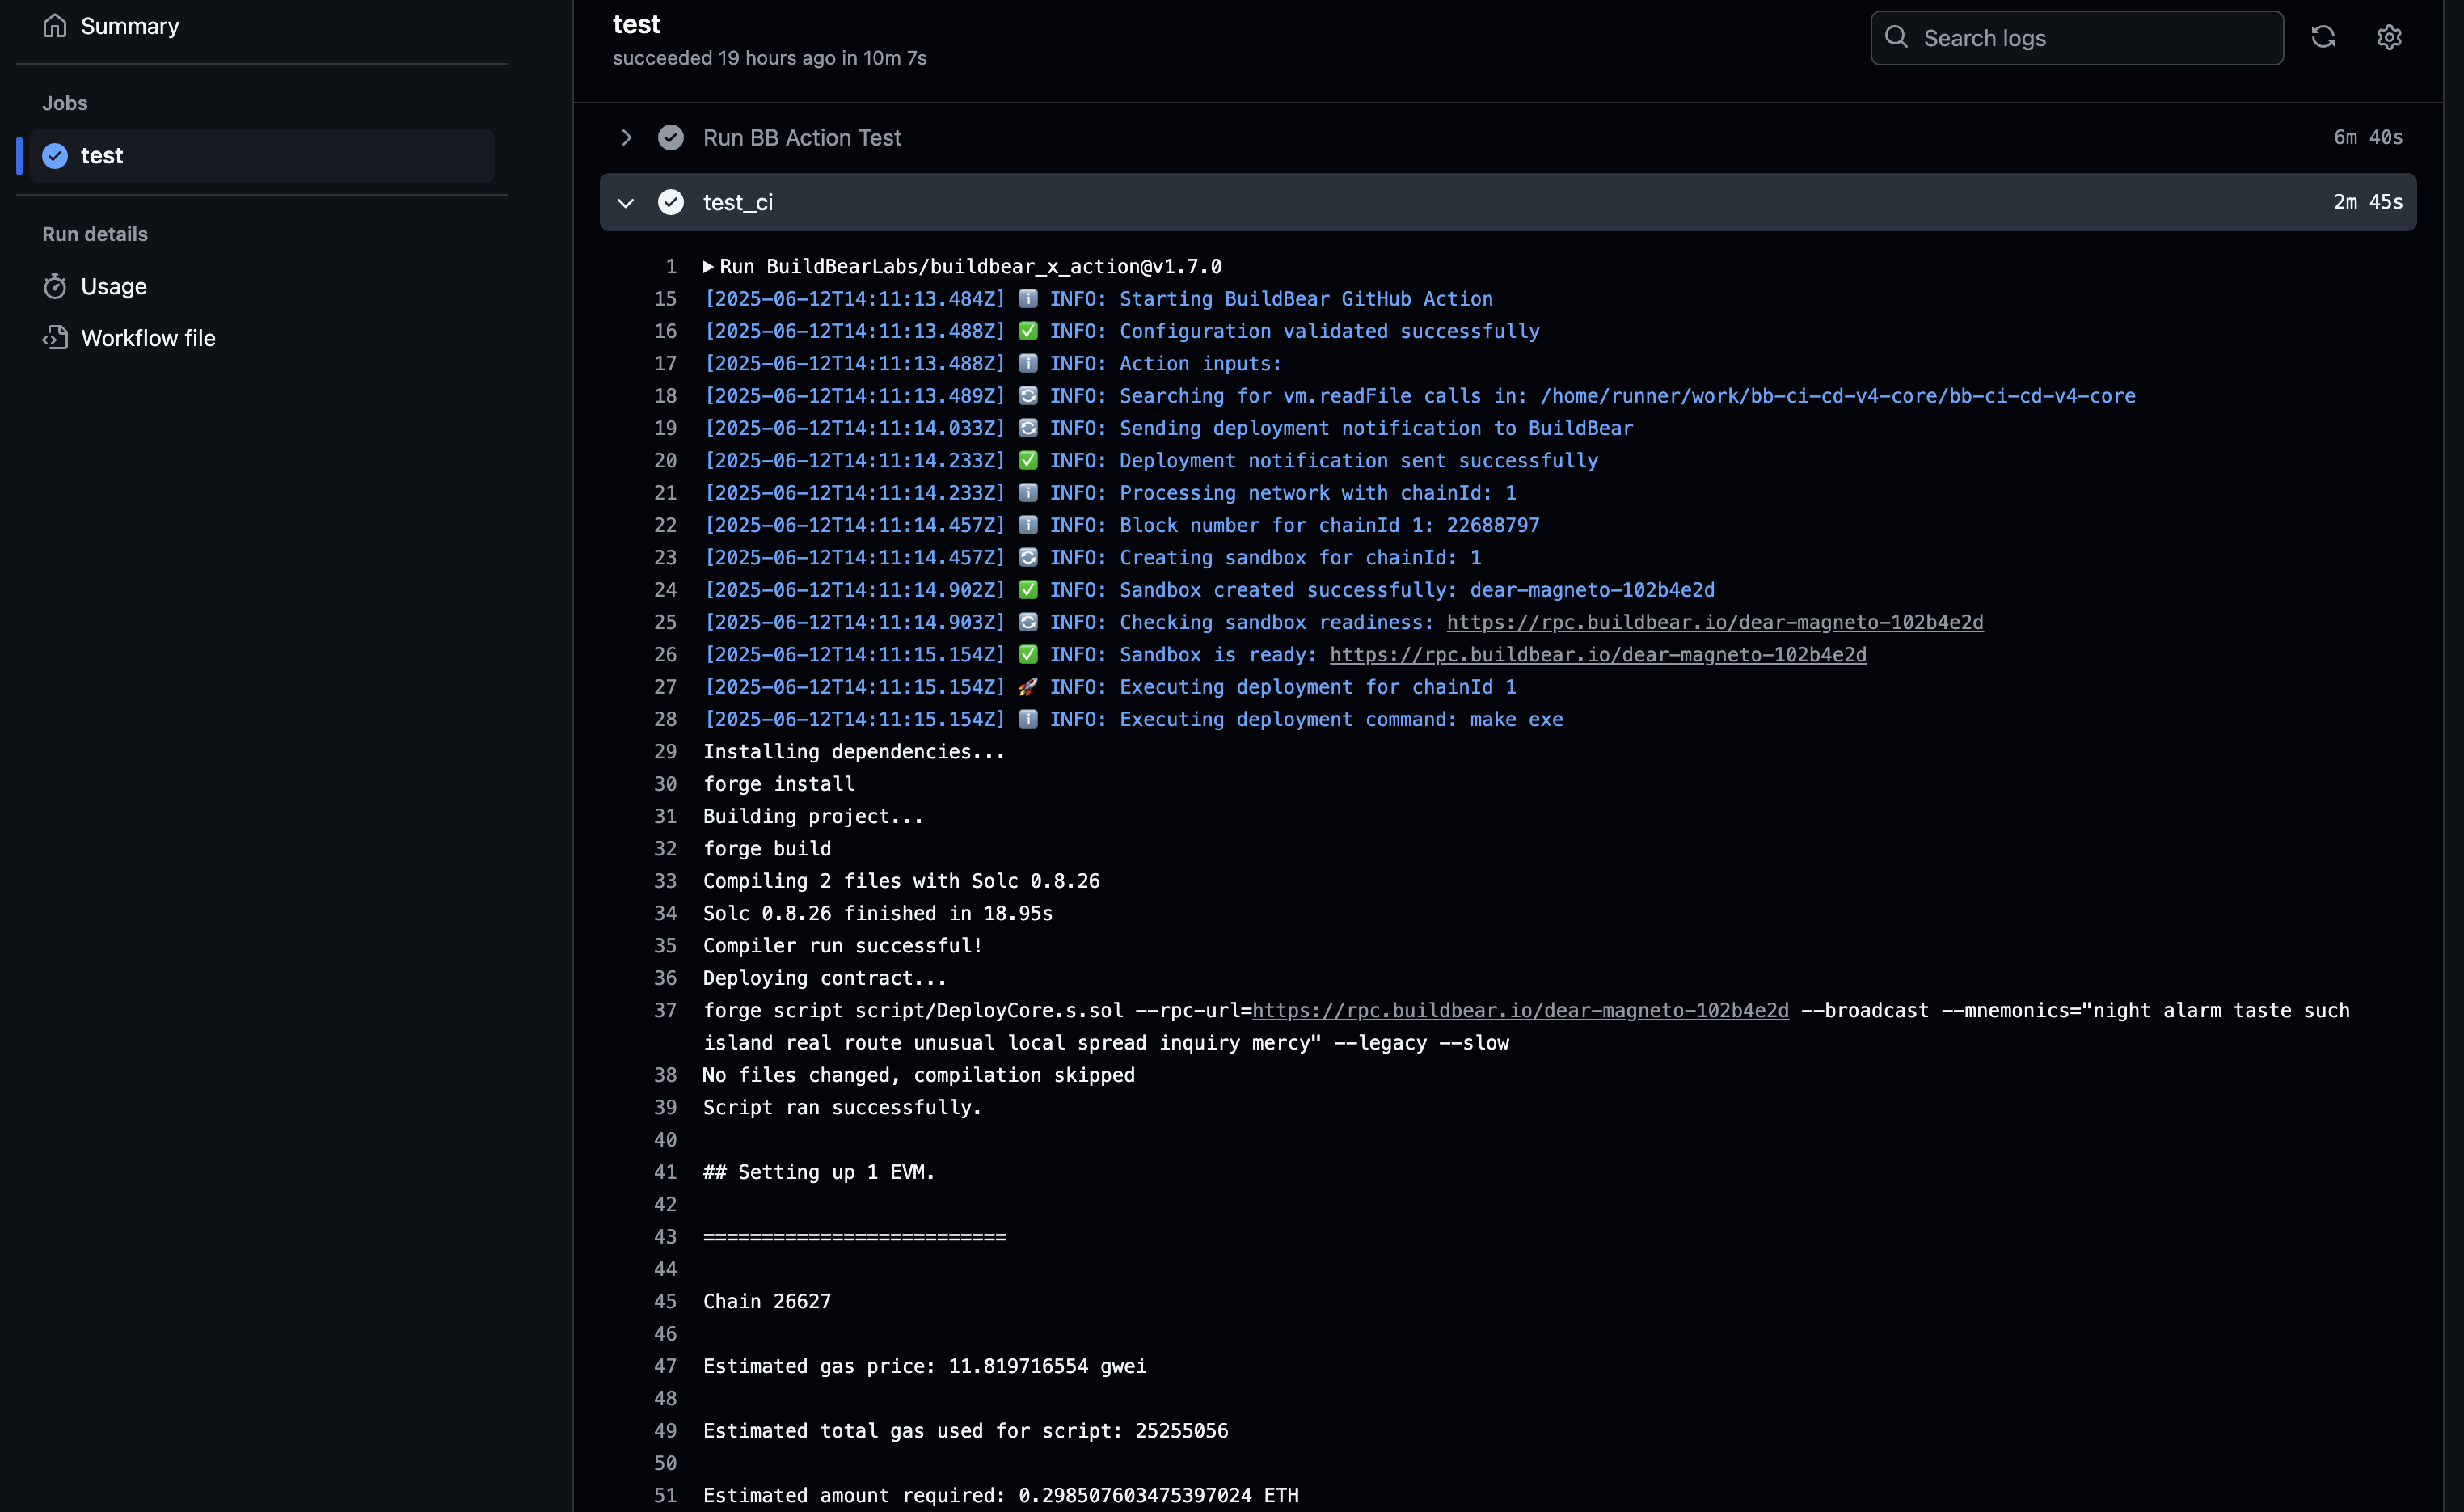
- Monitor individual jobs like the
testjob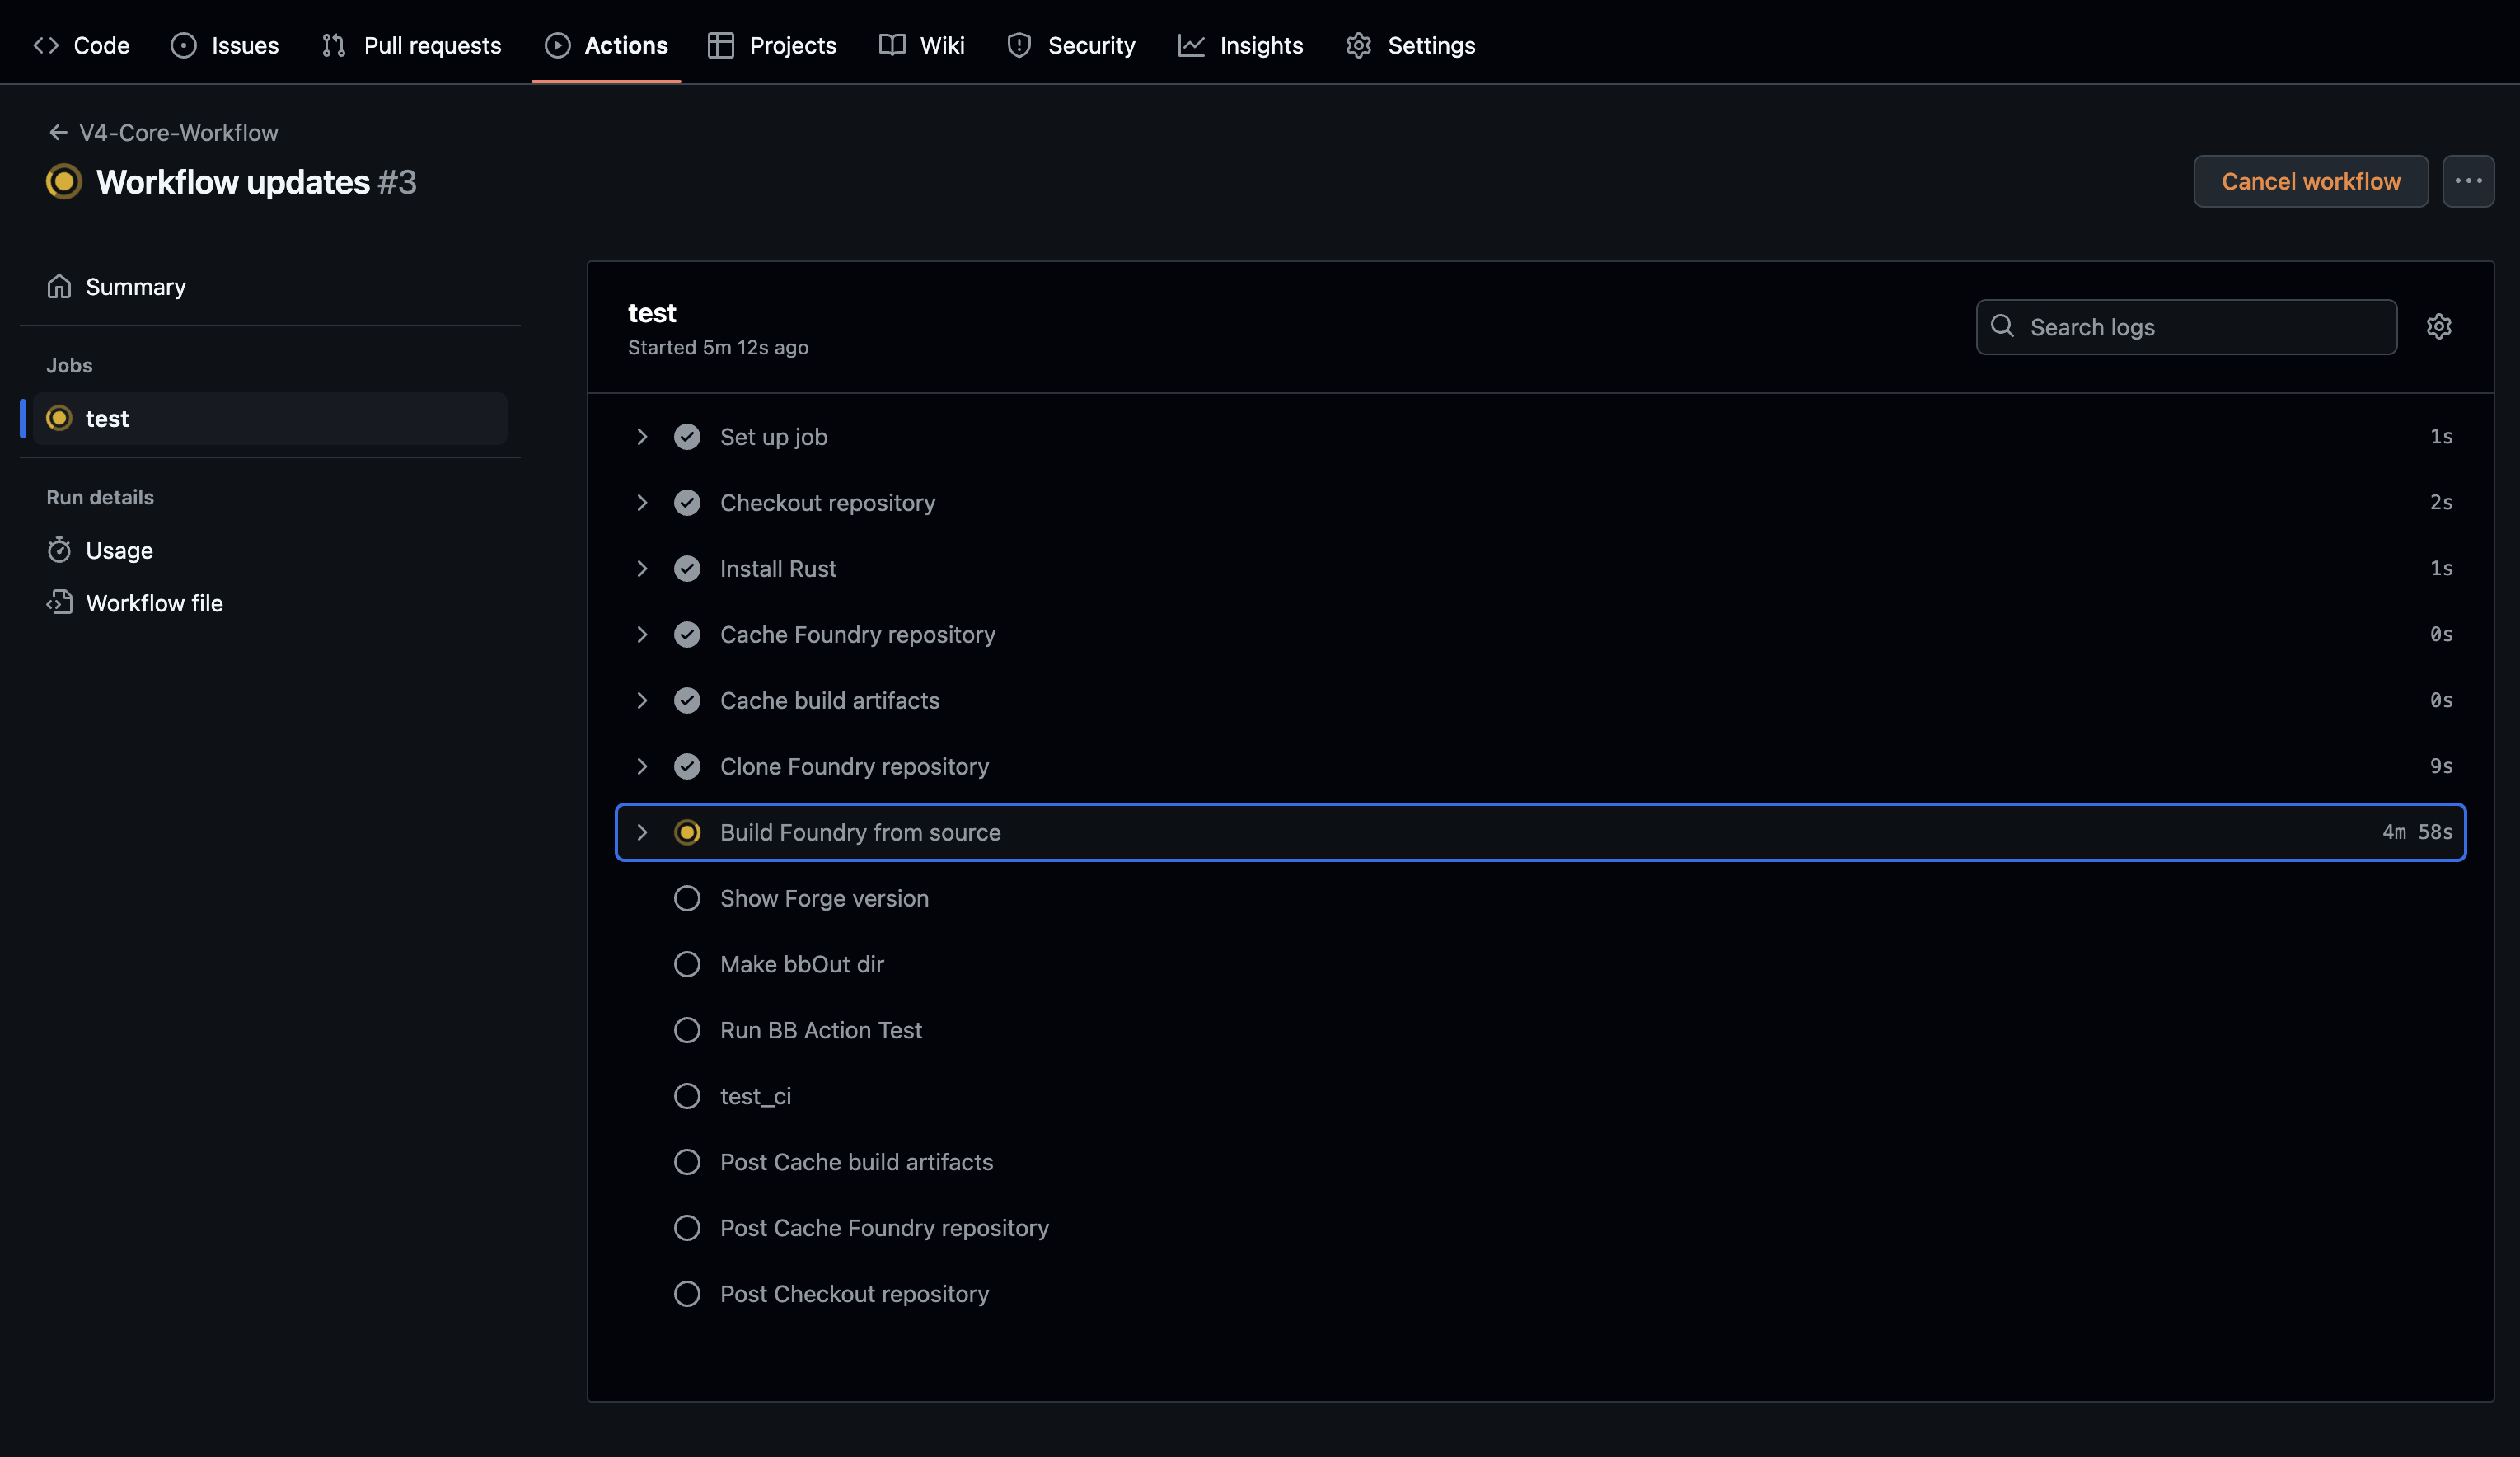
BuildBear Dashboard Results
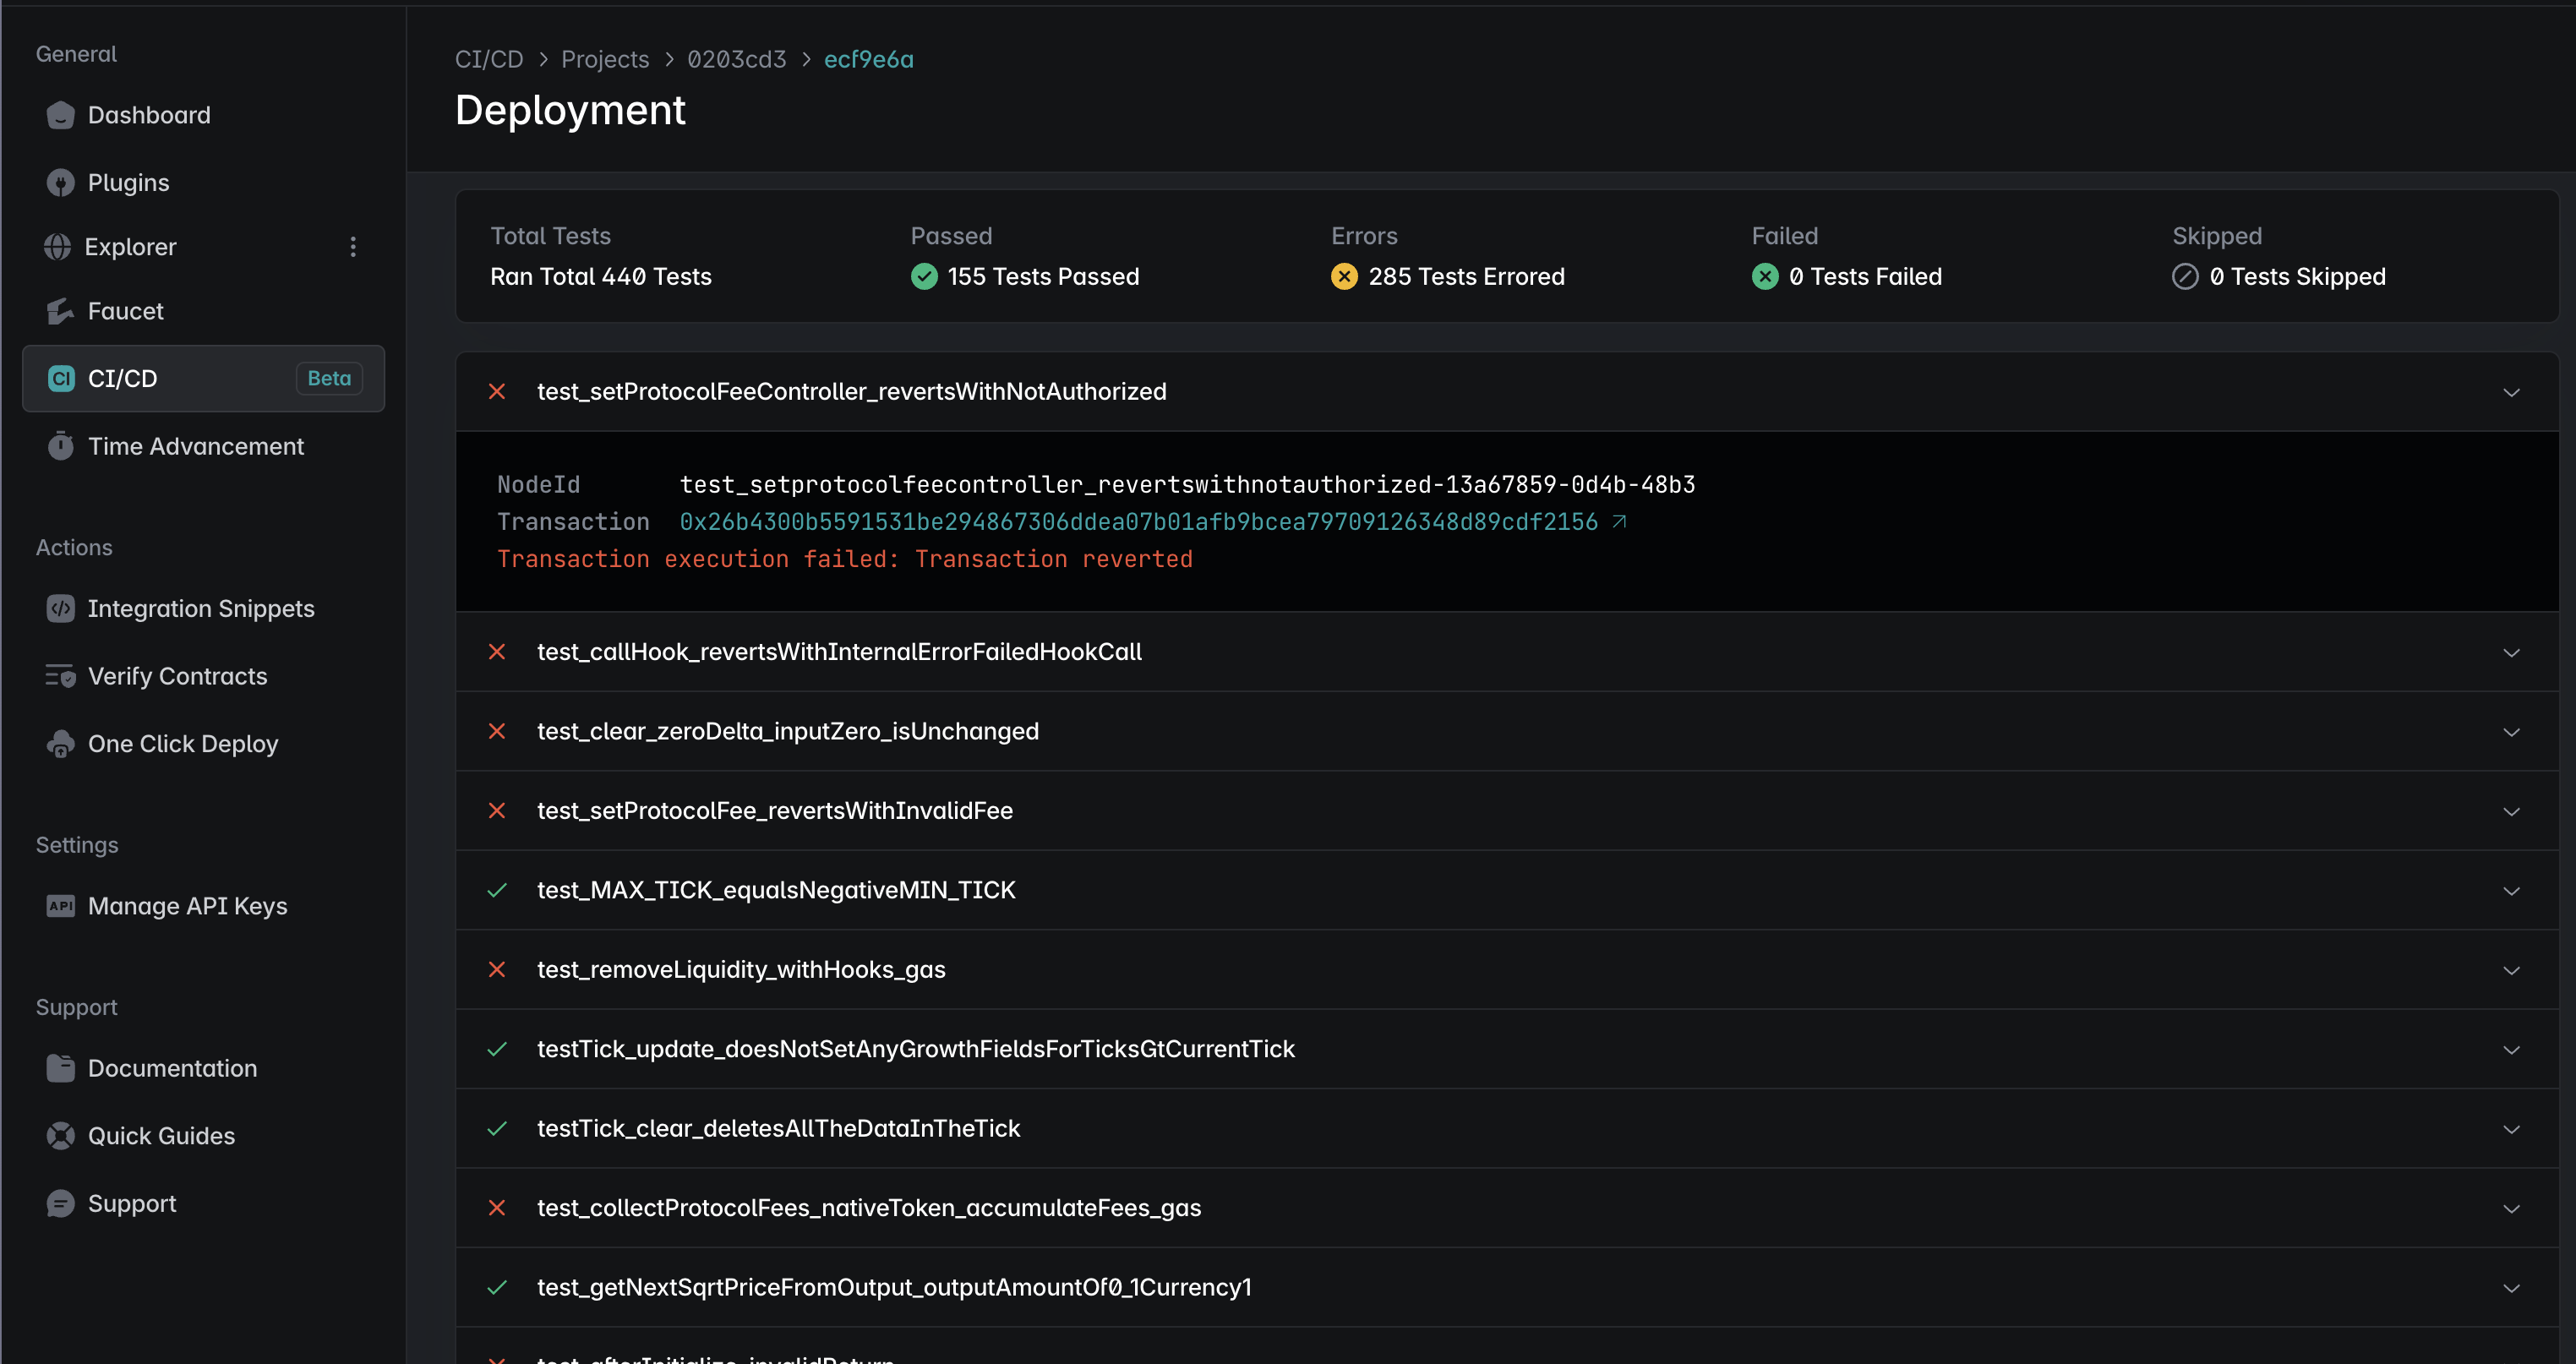
The CI/CD dashboard displays comprehensive results after workflow completion:
Key metrics from the sample run:
- Total Tests: 440
- Passed: 155
- Errored: 285
- Failed: 0
- Skipped: 0
- Deployment Status: Success
- Test Status: Errored
On the CI/CD Dashboard, you’ll see total tests run, passed, errored, failed, and skipped. Scrolling down reveals individual test cases (NodeId, transaction hash, and revert message), helping you pinpoint exactly which assertion or hook failed and why.
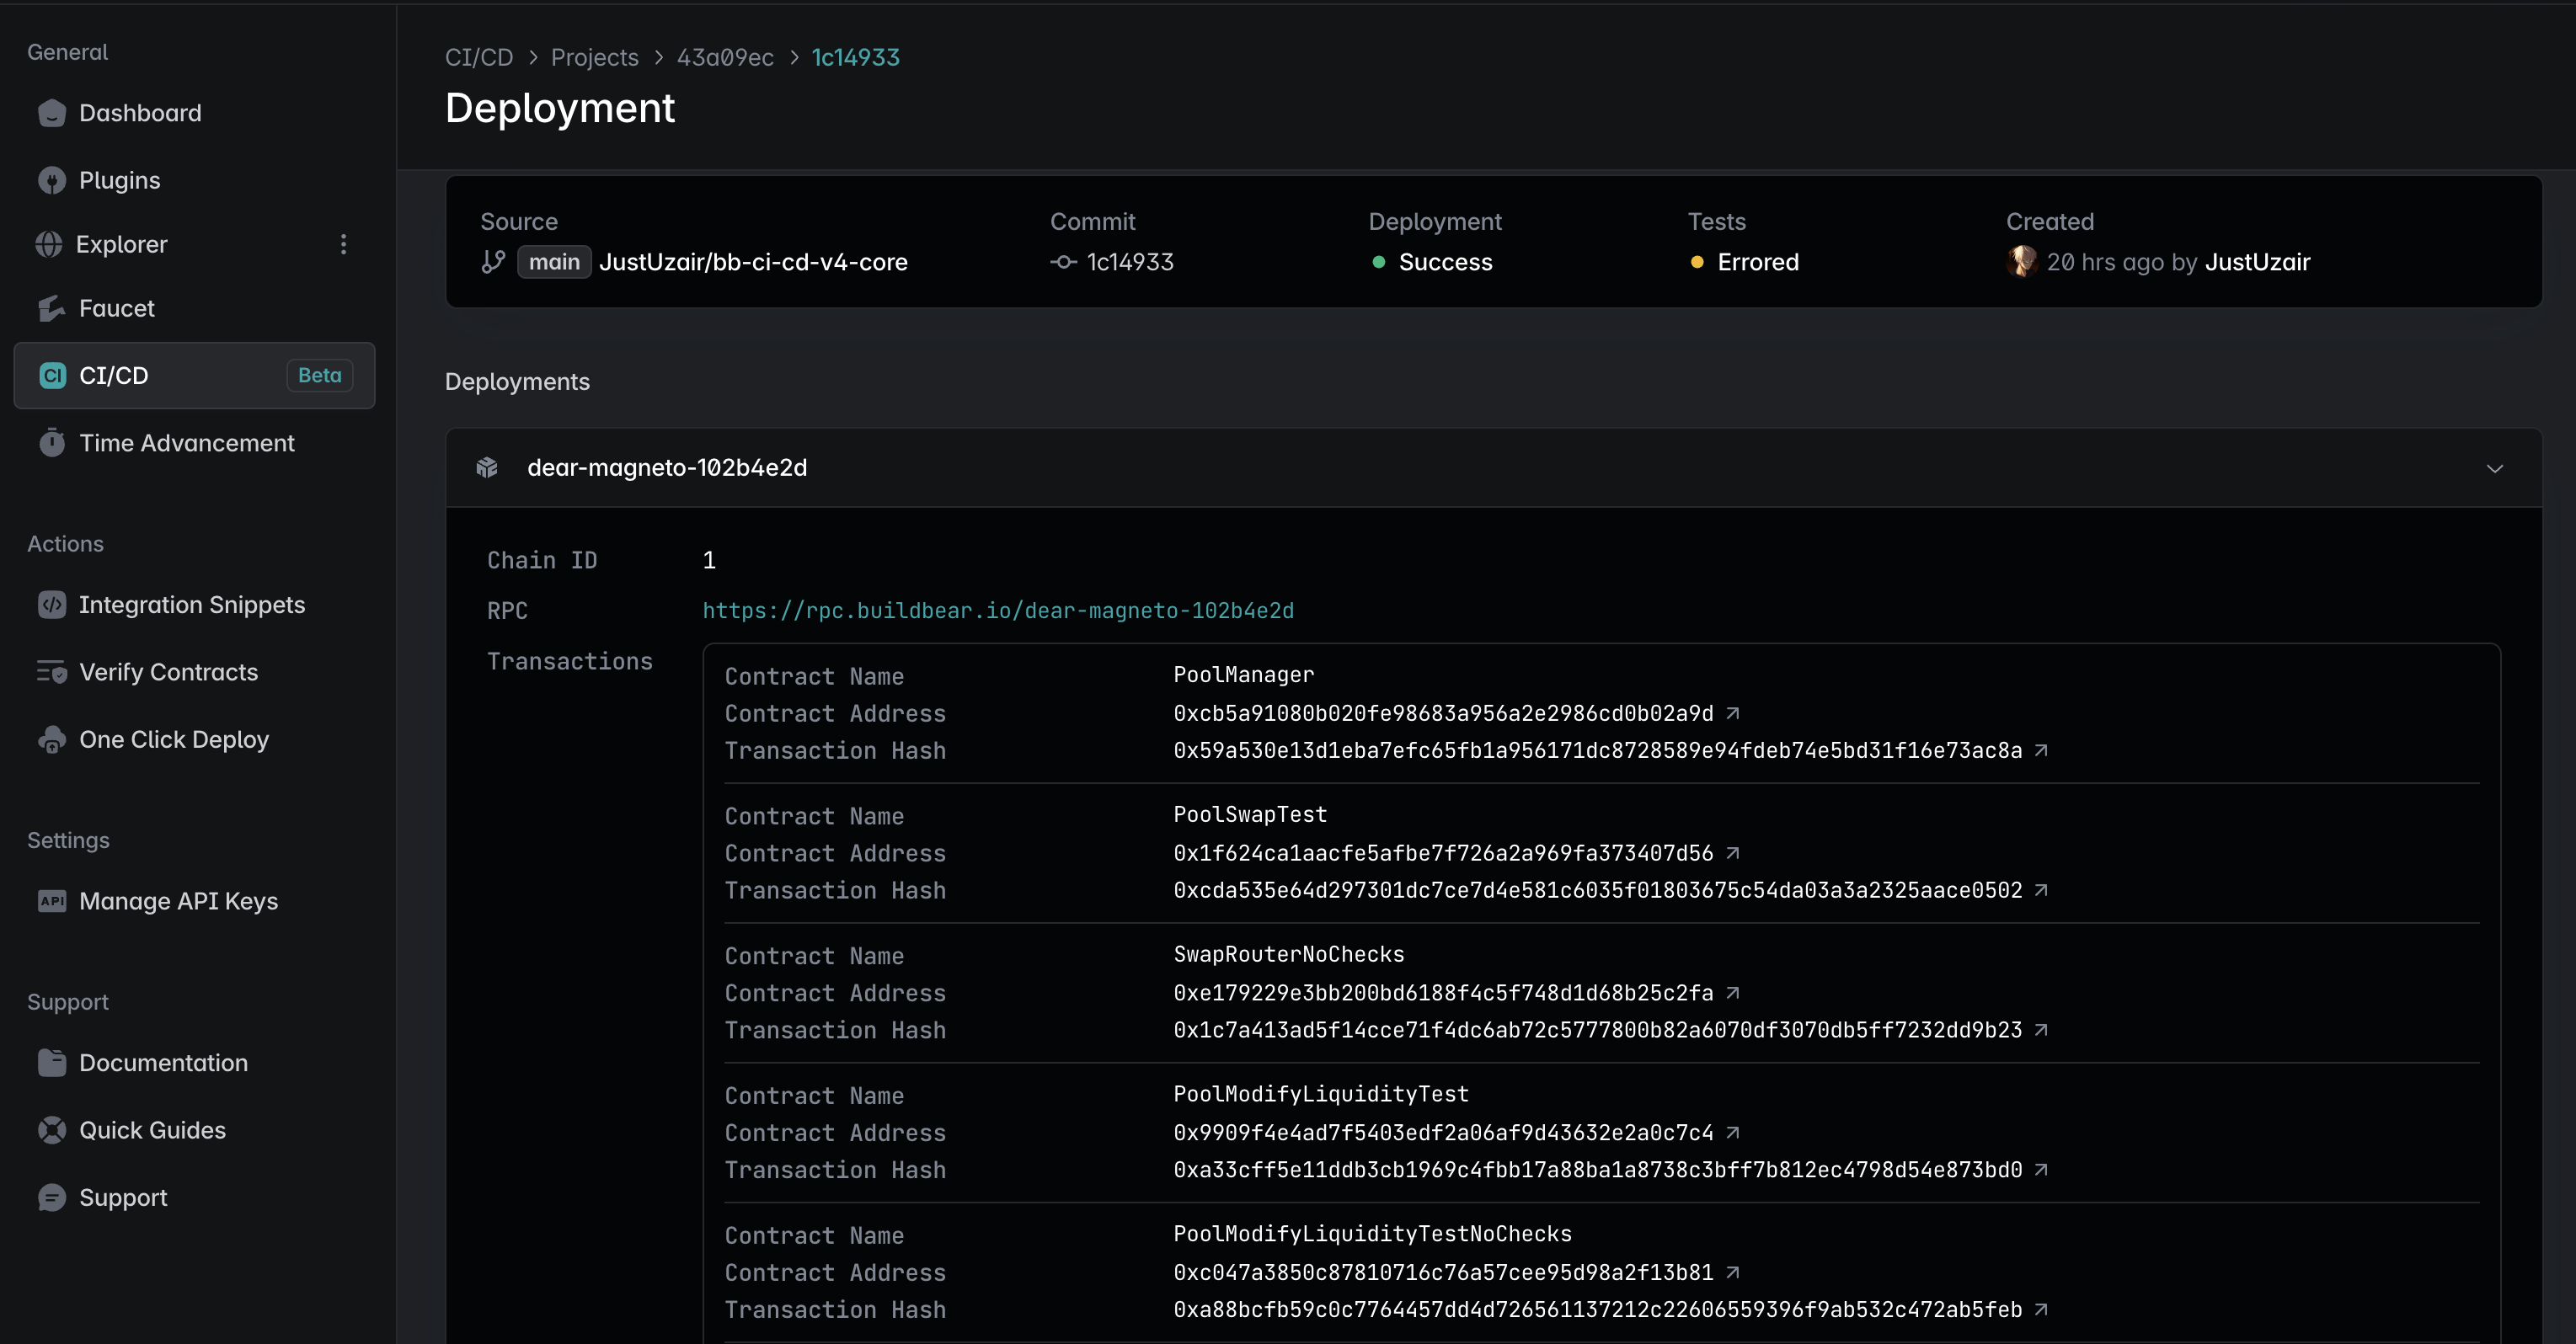
Each deployment entry corresponds to one Sandbox run. You can expand any card to see the chain ID, RPC endpoint, and a list of every contract deployed, along with its on‐chain address and clickable transaction hash, so you can jump straight to block explorers or debug logs.
Conclusion
In this tutorial, you set up BuildBear’s CI/CD integration to automatically build, deploy, and test your smart contracts in isolated Sandbox environments using GitHub Actions. You learned how to:
- Install and configure the BuildBear GitHub App
- Add your repository to the CI/CD dashboard and manage API keys
- Write a
buildbear.ymlworkflow that checks out code, installs dependencies, caches Foundry, and runs your tests inside a Sandbox - Trigger workflows on push and monitor execution in both GitHub Actions and the BuildBear dashboard
- Inspect detailed deployment logs and test results with clickable transaction hashes and revert messages
With BuildBear CI/CD, you get end-to-end reproducibility, instant Sandbox provisioning, and rich on-chain observability.
Batua Smart-Account Wallet Tutorial
Step-by-step setup and configuration for a Next.js app integrating Batua’s smart-account SDK and Wagmi/RainbowKit.
BuildBear Labs Raises $1.9M and Launches Phoenix Engine
BuildBear Labs secures funding and announces the Phoenix Engine, enhancing Web3 development tools.