Deploying Uniswap V3 on BuildBear Sandbox
Step-by-step guide to deploy the full Uniswap V3 suite (factory, router, swap pools) in a BuildBear Sandbox for testing and custom protocol development.
BuildBear sandboxes let you fork mainnet or testnets into a private, stateful environment, ideal for spinning up protocols like Uniswap V3 from scratch, tweaking them, and running deterministic tests without spending real funds.
You will need to create a BuildBear sandbox first. If you haven't done so, please follow the guide below:
1. Initialize a Hardhat Project
Initialize a new Hardhat workspace with an empty Hardhat config:
2. Install Dependencies
Add Uniswap V3 packages, Hardhat plugins, and Ethereum utilities:
3. Configure Hardhat
Edit hardhat.config.js to point at your BuildBear RPC and load your private key:
4. Verify Hardhat Tasks
Run the Hardhat CLI to confirm the installation of deploy plugin, and to check if it is available in the list of tasks:
5. Environment Variables
Create a .env file in your project root:
6. Obtain Your Private Key
Each sandbox ships with a funded mnemonic. To extract the first account’s key:
Copy the output into your .env as PRIVATE_KEY.
7. Deploy to BuildBear
With .env set, run:
npx hardhat tokamak-uniswap-v3-deploy --network buildbear
If setup correctly, the contracts should deploy on BuildBear Sandbox and following output will be displayed:
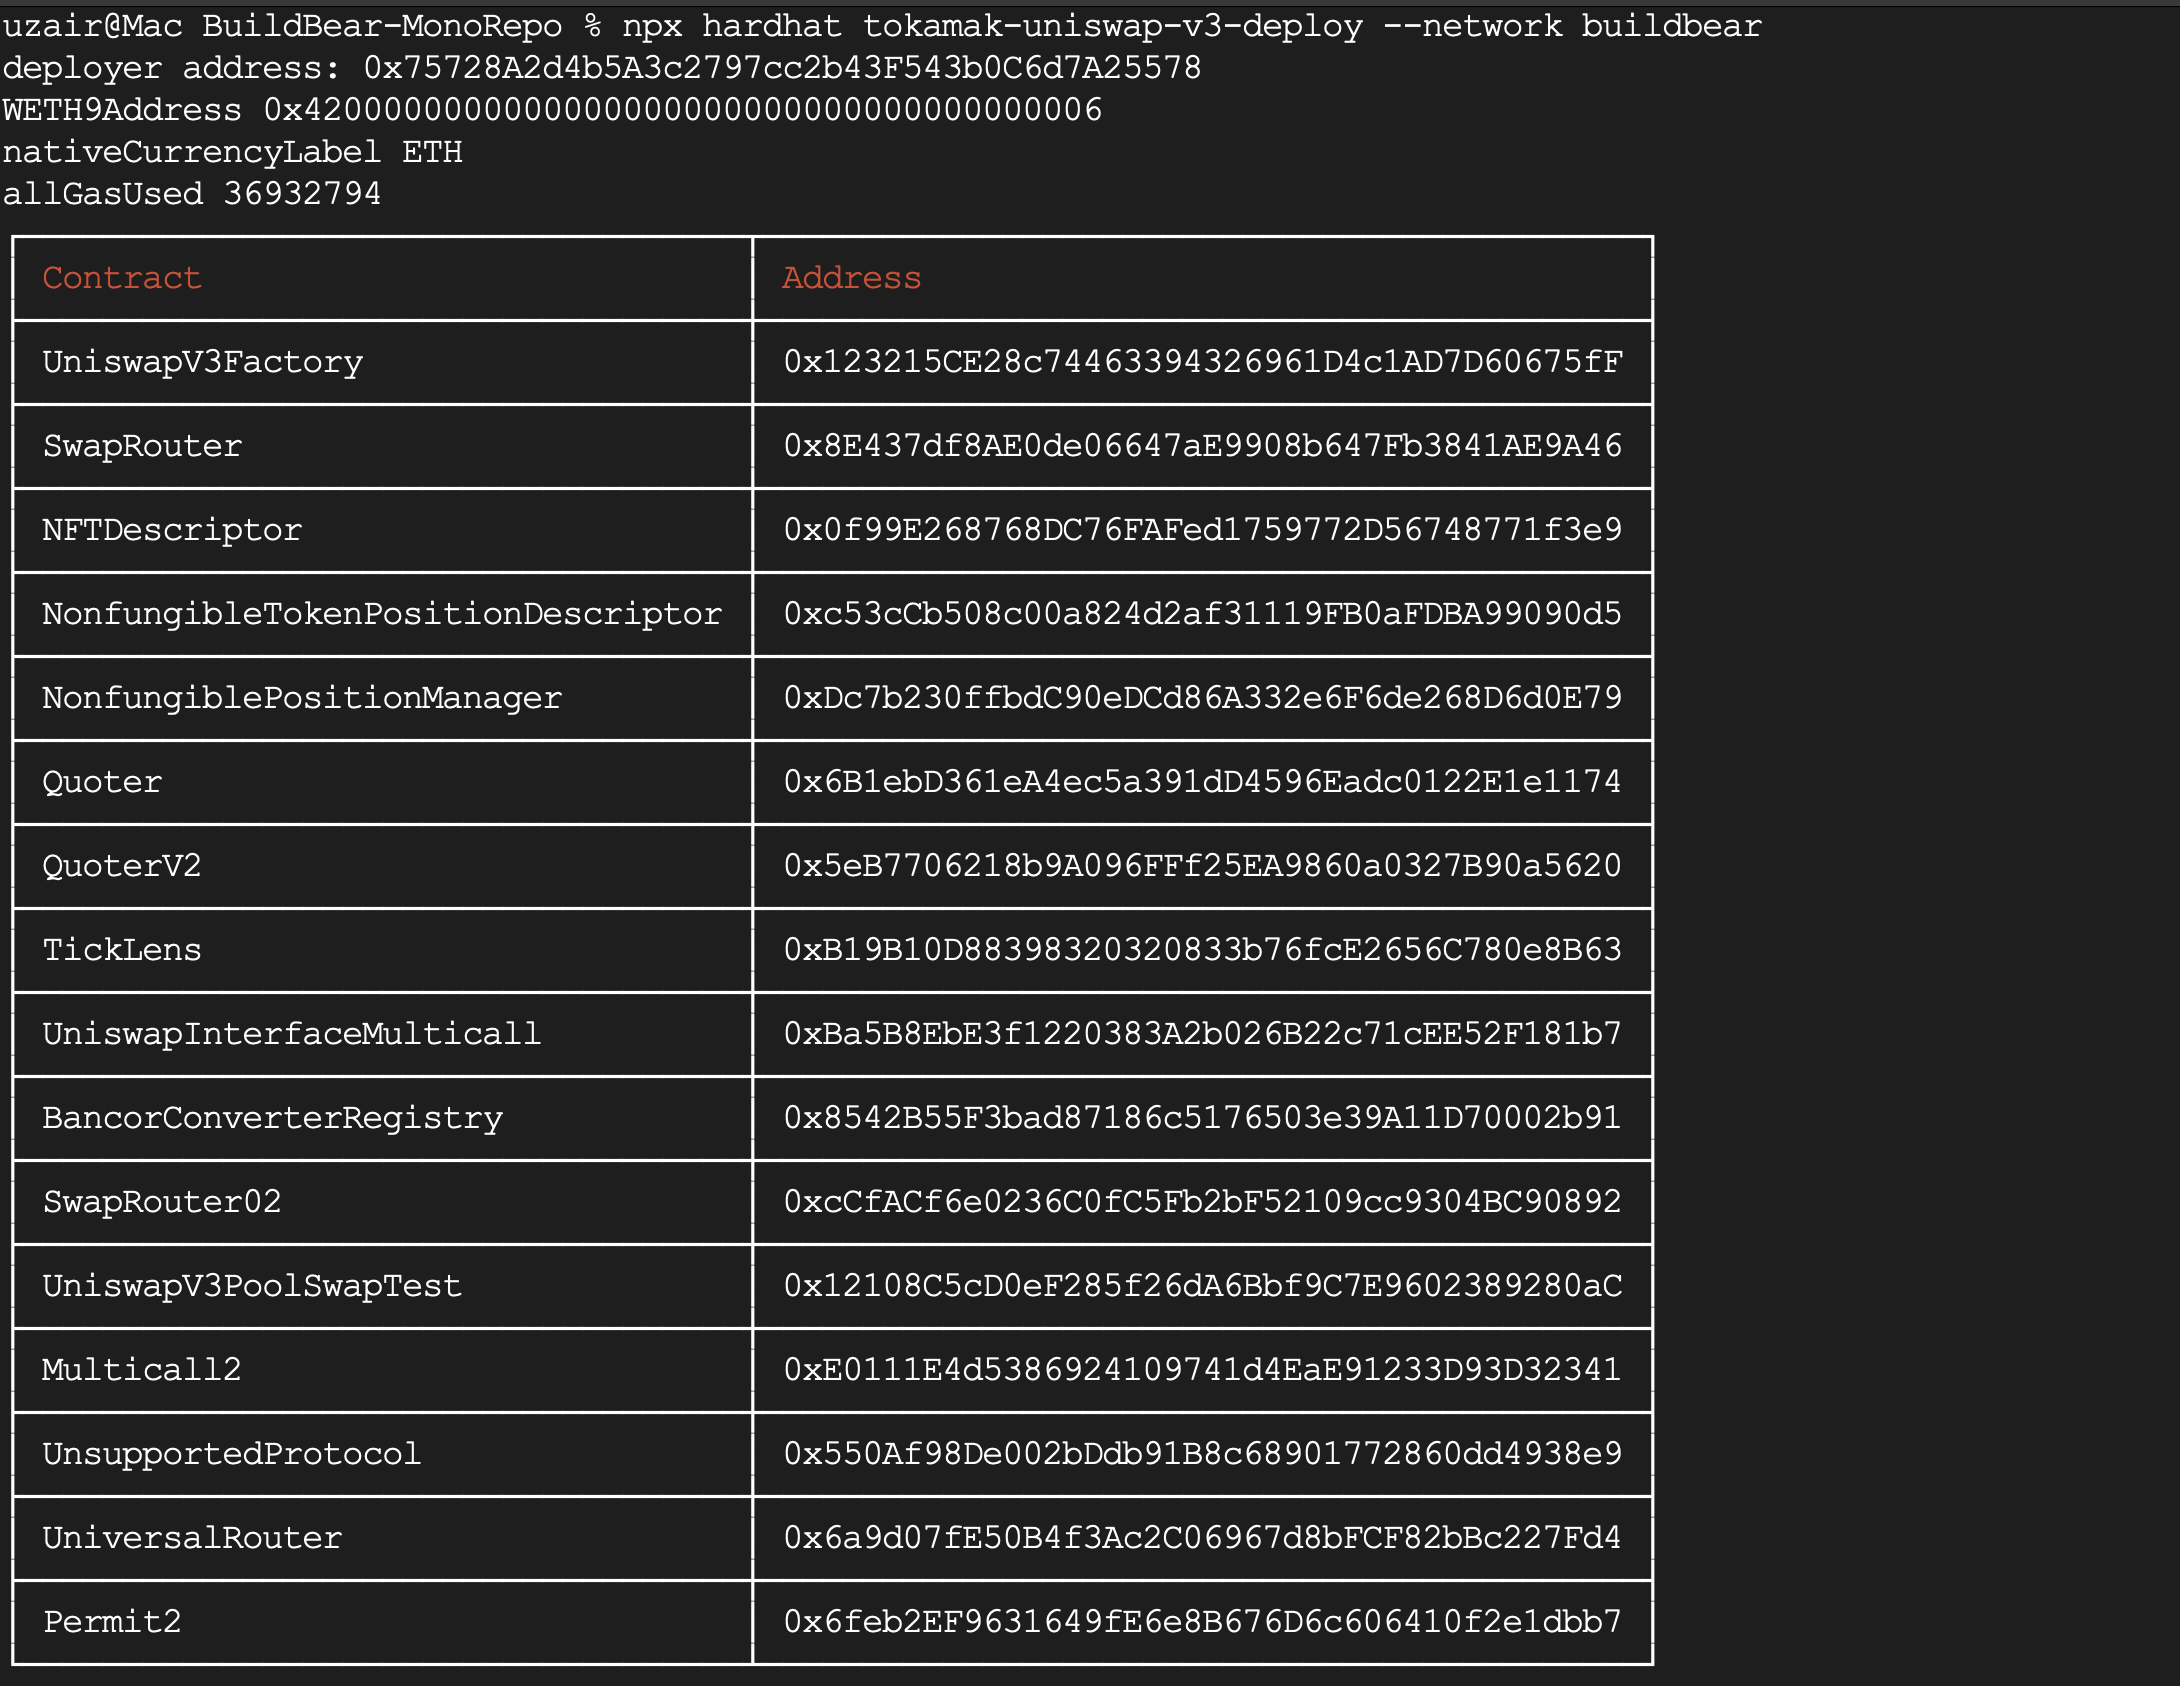
Your Uniswap V3 core and periphery contracts are now live in your sandbox, and are ready to be interacted with, to create pools, run tests, etc!
Why This Matters
Deploying a full Uniswap V3 stack in a BuildBear sandbox lets you:
- Customize & fork: Tweak factory parameters, router fees, or pool logic before going live.
- Test deterministically: Run complex scenarios repeatedly without affecting mainnet.
- Speed up iteration: Launch fresh sandboxes in seconds, pre-funded and ready for on-chain debug tools.
Ethereum's Dencun Upgrade to Begin Testing on Goerli Testnet
Ethereum's Dencun upgrade introduces EIP-4844 (proto-danksharding), reducing Layer 2 transaction fees significantly.
EIP-7702 Smart Accounts: Batch Execution & Sponsorship on BuildBear
Deploy and interact with a BatchCallAndSponsor smart-account using EIP-7702 and BuildBear Sandbox.